Category Archives: Lifestyle and Self-Care

Embrace a healthier lifestyle with self-care routines, productivity hacks, and wellness trends that enhance your daily life.

How to Get Rid of Dense Breast Tissue: The Ultimate Guide to Better Breast Health

Dense breast tissue is a topic that has garnered significant attention in recent years. Many women are eager to learn how to get rid of dense breast tissue for both health and aesthetic reasons. In this comprehensive guide, we delve deep into what dense breast tissue is, why it matters, and the most effective strategies—from natural remedies to medical interventions—to help you manage and potentially reduce dense breast tissue.

Understanding Dense Breast Tissue

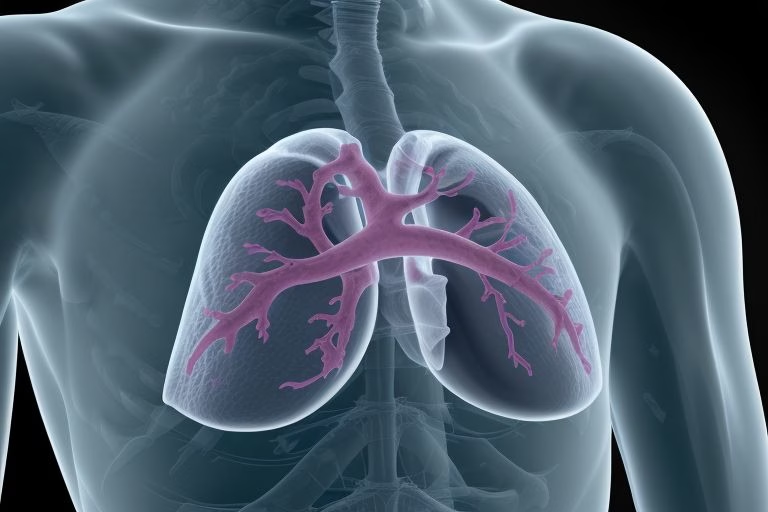
Dense breast tissue is a common condition where the breasts have a higher proportion of glandular and fibrous tissue compared to fatty tissue. On a mammogram, dense breasts appear white, making it more challenging for radiologists to detect abnormalities like tumors.

What Does It Mean to Have Dense Breasts?

  • High Levels of Fibroglandular Tissue: Dense breasts contain more fibrous or glandular tissue, which can sometimes mask the appearance of cancers on mammograms.
  • Screening Challenges: Because both dense tissue and tumors appear white on a mammogram, women with dense breast tissue may require additional imaging tests for accurate screening.
  • Prevalence: A significant percentage of women have dense breast tissue, which can vary based on age, genetics, and hormonal factors.

For a detailed explanation of dense breast tissue and its implications on health, consider reading this informative article on Mayo Clinic for expert insights.

Why Addressing Dense Breast Tissue Matters

The Health Risks Associated with Dense Breast Tissue

Having dense breast tissue can be concerning for several reasons:

  • Increased Risk of Breast Cancer: Studies have shown that women with dense breast tissue are at a higher risk of developing breast cancer compared to those with fattier breasts.
  • Diagnostic Difficulties: Dense tissue can obscure tumors on mammograms, leading to delays in diagnosis.
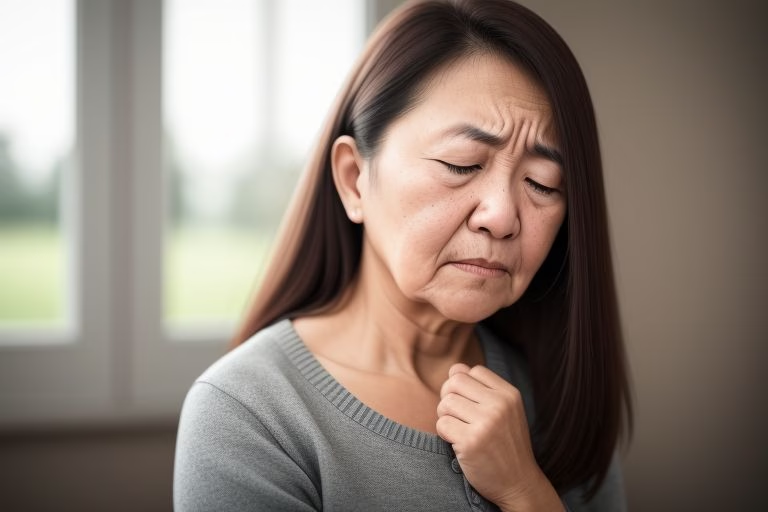
  • Emotional Impact: The uncertainty and stress associated with dense breast tissue can have emotional ramifications for many women.

To learn more about these risks, the American Cancer Society provides excellent resources on breast density and cancer risk.

Aesthetic and Lifestyle Concerns

Aside from health risks, many women seek advice on how to get rid of dense breast tissue for cosmetic reasons. While the density itself is not inherently problematic, a reduction in glandular tissue can sometimes lead to a more desirable breast appearance for some individuals.

Natural Methods to Manage Dense Breast Tissue

Many women are interested in natural, holistic approaches when it comes to managing dense breast tissue. Here are some strategies that may help:

1. Dietary Adjustments

A well-balanced diet can play a crucial role in overall breast health. Consider the following dietary changes:

  • Increase Antioxidants: Foods rich in antioxidants, such as berries, leafy greens, and nuts, may help reduce inflammation.
  • Omega-3 Fatty Acids: Incorporate fatty fish, flaxseeds, and walnuts to potentially modulate breast tissue density.
  • Reduce Estrogen-Influencing Foods: Limit intake of processed foods and consider moderating your consumption of high-fat dairy, as some studies suggest these may influence estrogen levels.

For additional nutritional insights, visit Harvard Health.

2. Herbal Remedies

Some herbs have been traditionally used to balance hormones and potentially influence dense breast tissue:

  • Chasteberry (Vitex agnus-castus): Known for its hormone-regulating properties.
  • Green Tea: Rich in antioxidants, green tea may help reduce inflammation.
  • Turmeric: Contains curcumin, which has anti-inflammatory properties.

Always consult a healthcare provider before starting any herbal supplement regimen.

3. Regular Exercise

Engaging in regular physical activity is essential for maintaining overall hormonal balance and reducing body fat. Exercise can help manage estrogen levels, which may in turn affect dense breast tissue.

For a guide on effective exercises for women’s health, check out Women's Health Magazine.

Medical Approaches to Reducing Dense Breast Tissue

While natural methods are beneficial, sometimes medical interventions are necessary to manage dense breast tissue effectively. Here are some options:

1. Hormonal Therapy

Hormonal therapy is one of the most common medical approaches to influence dense breast tissue. These therapies work by modulating the hormones that contribute to breast density.

Discuss with your healthcare provider if these therapies are appropriate for your situation.

2. Enhanced Imaging Techniques

For those with significant dense breast tissue, enhanced imaging methods can improve early detection:

  • 3D Mammography (Tomosynthesis): Provides a clearer image by taking multiple X-ray pictures of each breast from different angles.
  • MRI: Magnetic Resonance Imaging is particularly useful for high-risk patients.
  • Ultrasound: Often used as an adjunct to mammography for women with dense breasts.

For further reading on imaging techniques and breast density, the Radiological Society of North America offers a wealth of information.

3. Minimally Invasive Procedures

For some women, minimally invasive procedures may help reduce dense breast tissue:

  • Laser Therapy: Emerging treatments are exploring the use of laser therapy to target and reduce fibroglandular tissue.
  • Radiofrequency Ablation: Another innovative technique aimed at shrinking dense tissue through controlled heat.

It’s important to remember that these procedures are still under research in many cases. Always seek advice from a board-certified medical professional.

Lifestyle Changes to Support Breast Health

In addition to natural remedies and medical options, a holistic lifestyle approach can greatly benefit those dealing with dense breast tissue.

Stress Management

Chronic stress can influence hormonal imbalances, which in turn may affect breast tissue density.

  • Mindfulness Meditation: Regular practice can help reduce stress levels.
  • Breathing Exercises: Simple techniques like deep breathing can have immediate benefits.
  • Regular Sleep Patterns: Aim for 7–9 hours of quality sleep per night.

Weight Management

Maintaining a healthy weight can also play a crucial role:

  • Balanced Diet: Emphasize whole foods, lean proteins, and healthy fats.
  • Regular Exercise: Combine cardiovascular and strength training exercises.
  • Professional Guidance: Consider consulting a nutritionist for personalized advice.

Environmental Factors

Exposure to certain environmental toxins may influence breast tissue density:

  • Avoid Endocrine Disruptors: Reduce exposure to chemicals found in some plastics, pesticides, and personal care products.
  • Organic Choices: Where possible, choose organic produce to minimize exposure to harmful pesticides.

For more details on how lifestyle changes can impact breast health, explore resources at Environmental Working Group.

Innovative Research and Future Directions

Research into dense breast tissue is continually evolving, offering new hope for more effective management strategies in the future. Here are some promising areas:

Genetic Research

Understanding the genetic factors that contribute to dense breast tissue could pave the way for personalized treatment plans.

  • Genomic Profiling: Research into individual genetic makeup may help predict breast density and cancer risk.
  • Biomarker Development: Identifying specific biomarkers could lead to earlier detection and more targeted therapies.

Advanced Imaging Technologies

As imaging technology improves, so does our ability to detect and manage dense breast tissue.

  • Artificial Intelligence (AI): AI algorithms are increasingly used to interpret mammograms more accurately.
  • Molecular Imaging: This technique aims to visualize biological processes at the molecular level, offering a deeper insight into breast tissue characteristics.

Clinical Trials

Ongoing clinical trials are essential for testing the efficacy of new treatments aimed at reducing dense breast tissue.

  • Hormonal Interventions: Trials continue to assess the safety and effectiveness of various hormonal therapies.
  • Non-Invasive Procedures: Innovative methods like cryoablation and focused ultrasound are under investigation.

For the latest updates on research, consider visiting ClinicalTrials.gov.

Frequently Asked Questions About Dense Breast Tissue

What Causes Dense Breast Tissue?

Several factors contribute to dense breast tissue:

  • Genetics: Family history plays a significant role.
  • Age and Hormones: Younger women and those with higher estrogen levels are more likely to have dense breasts.
  • Lifestyle Factors: Diet, exercise, and environmental exposures can also influence density.

Can Dense Breast Tissue Be Prevented?

While you cannot entirely prevent dense breast tissue due to genetic factors, you can take steps to manage it:

  • Healthy Lifestyle: Regular exercise, a balanced diet, and stress management can help maintain overall breast health.
  • Regular Screenings: Early detection through regular imaging tests is key.

Is Dense Breast Tissue Always a Cause for Concern?

Not necessarily. While dense breast tissue can increase the risk of breast cancer and complicate screenings, it is only one of many risk factors. Regular consultations with your healthcare provider will help determine your overall risk profile.

How Do I Talk to My Doctor About Dense Breast Tissue?

It’s important to have an open dialogue with your healthcare provider:

For more personalized advice, consider reviewing guidelines available on the National Cancer Institute.

Step-by-Step Guide: How to Get Rid of Dense Breast Tissue Naturally

If you’re looking for practical tips on how to get rid of dense breast tissue using natural methods, follow these actionable steps:

Step 1: Assess Your Diet

  • Start a Food Diary: Monitor your food intake to identify areas for improvement.
  • Incorporate Superfoods: Add antioxidant-rich foods such as berries, spinach, and green tea.
  • Limit Processed Foods: Focus on whole, unprocessed foods to support hormonal balance.

Step 2: Establish a Regular Exercise Routine

Step 3: Explore Natural Supplements

  • Herbal Support: Consider herbs like chasteberry or turmeric after consulting with a healthcare professional.
  • Omega-3 Fatty Acids: Add sources like flaxseeds or fish oil to your diet.
  • Probiotics: Support your gut health, which is linked to overall hormone regulation.

Step 4: Monitor Your Hormonal Health

Step 5: Incorporate Stress-Reduction Techniques

  • Daily Meditation: Even a short daily session can make a difference.
  • Mindful Breathing: Practice deep breathing exercises during stressful moments.
  • Yoga: Integrate yoga sessions into your weekly routine for both physical and mental benefits.

For further guidance on natural health and wellness strategies, visit Healthline.

The Role of Technology in Managing Dense Breast Tissue

Advancements in technology are making it easier than ever to manage dense breast tissue. Here’s how:

Digital Health Tools

  • Mobile Apps: There are apps designed to track your menstrual cycle, diet, and exercise, which can help monitor changes in breast density.
  • Telemedicine: Remote consultations with healthcare professionals ensure you receive timely advice without leaving home.

Artificial Intelligence in Diagnostics

  • Enhanced Accuracy: AI is revolutionizing how radiologists interpret mammograms, especially in women with dense breast tissue.
  • Predictive Analytics: Using machine learning, AI can help predict which patients might be at higher risk, allowing for earlier intervention.

For more information on technological advancements in breast health, check out TechCrunch Health.

Real-Life Success Stories and Testimonials

Many women have successfully managed dense breast tissue through a combination of natural and medical interventions. Here are a few testimonials that illustrate different approaches:

Testimonial 1: Sarah’s Journey to Better Health

“After learning about dense breast tissue, I changed my diet, started exercising regularly, and incorporated mindfulness into my daily routine. Over time, I noticed improvements not just in my overall health, but also in the density of my breast tissue. I now feel empowered and informed about my health choices.”

Testimonial 2: Maria’s Medical Intervention

“My doctor recommended additional imaging and hormonal therapy because of my dense breast tissue. While the process was challenging, regular check-ups and open communication with my healthcare provider made all the difference. I now feel more secure about my breast health.”

These stories highlight that whether you choose natural methods, medical interventions, or a combination of both, there are viable paths to managing dense breast tissue effectively.

Final Thoughts: Taking Charge of Your Breast Health

Addressing dense breast tissue is a multifaceted journey that involves lifestyle modifications, natural remedies, and, when necessary, medical interventions. By taking proactive steps—such as maintaining a balanced diet, exercising regularly, managing stress, and staying informed about the latest research—you can significantly improve your overall breast health.

Your Next Steps

  1. Consult a Healthcare Professional: Before making any significant changes, discuss your options with a doctor who understands your unique medical history.
  2. Educate Yourself: Knowledge is power. Regularly read up on new research and guidelines from reputable sources like Mayo Clinic and American Cancer Society.
  3. Adopt a Holistic Approach: Combining natural remedies with medical advice offers the best chance for success.

Remember, while the journey to understand how to get rid of dense breast tissue may seem daunting, you are not alone. Empower yourself with knowledge, reach out to experts, and take proactive steps to ensure your breast health remains a top priority.

For additional tips and community support, consider joining online forums and support groups where many women share their experiences and insights on managing dense breast tissue.

Additional Resources and Further Reading

By following the insights and steps outlined in this guide, you will be well-equipped to manage and potentially reduce dense breast tissue effectively. Whether your goal is to improve diagnostic clarity or enhance your overall breast health, every positive change contributes to a healthier future.

This comprehensive guide aims to serve as your go-to resource on how to get rid of dense breast tissue, combining expert advice, scientific research, and real-life success stories. Armed with the latest information and actionable tips, you can confidently take charge of your breast health and work towards a better, healthier tomorrow.

Why Your wrist is itchy: Causes, Remedies, and Expert Advice

Experiencing an itchy wrist can be both annoying and concerning. Whether it’s a fleeting irritation or a persistent discomfort, understanding why your wrist is itchy is key to finding relief. In this comprehensive guide, we’ll explore the causes, symptoms, home remedies, medical treatments, and preventive measures associated with this common issue. With insights drawn from trusted sources and expert advice, you’ll learn how to tackle an itchy wrist and maintain healthy skin.

An itchy wrist is more than just a minor irritation. It can sometimes signal an underlying condition that needs attention. In our fast-paced world, stress, environmental factors, and lifestyle choices often contribute to skin irritations. If you’ve ever found yourself scratching your wrist is itchy area, you’re not alone. Millions of people experience this discomfort, and understanding the root causes is the first step toward effective treatment.

The goal of this article is to provide you with an all-encompassing resource that not only explains why your wrist is itchy but also offers practical solutions to bring you lasting relief. We’ll dive into common causes, home remedies, and preventive measures, backed by expert advice and reputable sources such as Healthline and Mayo Clinic.

Understanding the Itch: Why Your wrist is itchy

When your wrist is itchy, it’s important to understand that itching is your body’s natural way of signaling irritation or an abnormal reaction in the skin. Itchy wrist discomfort can arise from a variety of factors, ranging from simple dry skin to more complex conditions such as eczema or allergic reactions.

The Science Behind Itching

Itching, medically known as pruritus, is a sensation that compels you to scratch. This reaction can be triggered by chemical signals in the body, often due to histamine release in response to irritants or allergens. When you scratch an itchy area, it temporarily relieves the discomfort, but it can also exacerbate the irritation if done excessively.

For a deeper understanding of how skin reacts to irritants, check out this detailed explanation on WebMD’s overview of itching.

Common Causes of an Itchy Wrist

Understanding why your wrist is itchy is crucial for choosing the right treatment. Below are the most common causes:

Dry Skin

One of the most common reasons your wrist is itchy is due to dry skin. When the skin loses its moisture, it becomes prone to cracking, flaking, and irritation. This is especially common during the winter months or in environments with low humidity.

Allergies and Irritants

Contact with certain chemicals, metals, or even fabrics can trigger an allergic reaction, leading to contact dermatitis. If your wrist is itchy after wearing a new watch, bracelet, or even after exposure to cleaning agents, it might be an allergic response.

  • Example: Nickel, a common metal in jewelry, is a frequent allergen.
  • Key Tip: Consider hypoallergenic alternatives if you notice a pattern of irritation.

Skin Conditions

Several skin conditions can cause your wrist is itchy. These include:

  • Eczema: A condition where the skin becomes inflamed, red, and itchy.
  • Psoriasis: Characterized by red, scaly patches that may cause intense itching.
  • Key Tip: Understanding your skin’s specific condition is crucial. Learn more about eczema and its management on Mayo Clinic’s website.

Infections

Infections, both bacterial and fungal, can lead to an itchy wrist. For instance, fungal infections like ringworm can cause a red, circular rash accompanied by itching.

Systemic Conditions

Sometimes, an itchy wrist is not just a local issue but a symptom of a systemic condition. Diseases such as diabetes or thyroid disorders can have skin manifestations that include itching.

Identifying the Symptoms

Recognizing the symptoms that accompany an itchy wrist can help you determine its cause and decide on the next steps for treatment. Common symptoms include:

Remember: If you notice signs of infection (such as pus or increased pain), or if the itching becomes unbearable, it’s essential to seek medical advice promptly.

Effective Home Remedies and Self-Care Tips

Many cases of an itchy wrist can be managed effectively with home remedies. Here are some tried-and-tested solutions:

Moisturizing

Keeping your skin hydrated is the first line of defense against an itchy wrist. Use a fragrance-free moisturizer several times a day, especially after washing your hands.

  • Pro Tip: Look for products containing ceramides or hyaluronic acid to lock in moisture.

Cool Compress

A cool, damp cloth applied to the affected area can reduce itching and soothe inflammation. This is especially helpful if the itchy wrist is due to an allergic reaction or minor irritation.

Oatmeal Baths

Oatmeal is known for its soothing properties. Adding colloidal oatmeal to a lukewarm bath can help relieve the discomfort of an itchy wrist and other areas of dry, irritated skin.

Over-the-Counter Creams

Antihistamines and hydrocortisone creams can provide temporary relief from an itchy wrist. These are especially useful if the itching is due to an allergic reaction.

  • Key Tip: Always follow the instructions on the packaging and consult a pharmacist if you’re unsure about the dosage.

Avoiding Irritants

If you suspect that certain substances are triggering your itchy wrist, try to avoid them. This might mean switching to hypoallergenic skincare products or avoiding exposure to harsh chemicals.

  • External Resource: Learn more about avoiding common irritants on Verywell Health.

Stress Management

Believe it or not, stress can exacerbate skin conditions, including an itchy wrist. Incorporating stress-reducing techniques such as meditation, yoga, or regular exercise into your routine can help manage symptoms.

  • Pro Tip: Even a short daily meditation session can work wonders for your overall skin health.

When to Seek Professional Medical Advice

While home remedies can be effective for mild cases, there are times when professional intervention is necessary. Consider consulting a healthcare provider if:

  • Persistent Itching: Your wrist is itchy for several weeks without any improvement.
  • Severe Symptoms: There is significant swelling, pain, or the area becomes infected.
  • Underlying Conditions: You suspect that a systemic condition may be causing your symptoms.
  • Uncertain Diagnosis: If you’re unsure about the cause of your itchy wrist, it’s better to get a professional opinion.

For more detailed guidelines, refer to Mayo Clinic’s recommendations on skin conditions.

Preventive Measures to Keep Your Skin Healthy

Prevention is always better than cure. Here are some strategies to help ensure that your wrist is itchy episodes are minimized:

Maintain a Consistent Skincare Routine

  • Daily Moisturizing: Incorporate a routine of applying moisturizer to your wrists and other exposed areas.
  • Gentle Cleansing: Use mild, fragrance-free cleansers to avoid stripping the skin of its natural oils.

Protect Your Skin from Environmental Factors

  • Weather Protection: In cold weather, cover your wrists with gloves to protect against dry air.
  • Sun Protection: Use sunscreen even on your wrists to prevent UV damage, which can lead to dryness and irritation.

Choose Skin-Friendly Products

  • Hypoallergenic Options: Opt for products that are designed for sensitive skin.
  • Avoid Harsh Chemicals: Read labels carefully and steer clear of products that contain known irritants.

Monitor Your Diet and Hydration

  • Stay Hydrated: Drinking plenty of water helps maintain skin moisture from the inside out.
  • Balanced Diet: Consuming a diet rich in vitamins and antioxidants can support overall skin health.

Regular Exercise and Stress Reduction

For further tips on preventive skincare, visit American Academy of Dermatology.

Lifestyle Changes and Advanced Treatments

For some individuals, persistent wrist is itchy may require more than just home remedies. Adopting certain lifestyle changes and considering advanced treatments can make a significant difference:

Prescription Medications

If over-the-counter products fail to provide relief, your healthcare provider might prescribe:

  • Topical Steroids: To reduce inflammation and itching.
  • Immunomodulators: Particularly for chronic skin conditions like eczema.
  • Antihistamines: To combat severe allergic reactions.

Phototherapy

For chronic skin conditions, phototherapy using controlled ultraviolet light may help reduce symptoms. This treatment should only be done under strict medical supervision.

Alternative Therapies

Some patients find relief with alternative treatments such as:

  • Acupuncture: May help in reducing stress and skin inflammation.
  • Herbal Remedies: Ingredients like aloe vera, chamomile, and calendula are known for their soothing properties.
  • Dietary Supplements: Omega-3 fatty acids and vitamin D supplements might improve skin health when taken as directed.

Digital Detox and Reduced Screen Time

Excessive screen time and digital stress can contribute to overall stress levels, indirectly impacting your skin. Consider regular digital detoxes to keep stress and its effects on your skin in check.

Regular Skin Examinations

For those with chronic issues, scheduling regular skin check-ups can help catch potential problems early. Dermatologists can provide personalized advice and monitor the effectiveness of your treatments.

Implementing these lifestyle changes can offer long-term benefits, not only for your wrist is itchy condition but for overall well-being.

Frequently Asked Questions (FAQs)

Q1: What are the most common reasons my wrist is itchy?

A: The most common reasons include dry skin, allergic reactions, and skin conditions such as eczema or contact dermatitis. In some cases, infections or systemic conditions can also cause the itch.

Q2: Can changing my watch or bracelet help?

A: Yes, if you suspect your itchy wrist is due to an allergic reaction to nickel or other materials in your accessories, switching to hypoallergenic options can reduce irritation.

Q3: Are home remedies effective for an itchy wrist?

A: For mild cases, home remedies like moisturizing, cool compresses, and oatmeal baths are often effective. However, if symptoms persist, it’s important to seek professional advice.

Q4: When should I see a doctor about my itchy wrist?

A: Consult a healthcare provider if the itching is severe, persists for more than a few weeks, or is accompanied by other symptoms such as swelling, pain, or signs of infection.

Q5: How can I prevent my wrist is itchy episodes?

A: Maintaining a consistent skincare routine, avoiding irritants, protecting your skin from harsh environmental factors, and managing stress are all effective preventive measures.

For more FAQs and detailed advice, check out this comprehensive resource from Healthline’s FAQ section on skin issues.

Conclusion

An itchy wrist might seem like a minor nuisance, but it can sometimes be a sign of an underlying condition that needs attention. By understanding the causes—from dry skin and allergies to more complex skin conditions—and applying the remedies and preventive measures discussed above, you can take proactive steps toward maintaining healthy skin.

Whether you’re managing an occasional bout of irritation or dealing with a chronic condition, the key is to listen to your body and act early. Remember that a consistent skincare routine, combined with healthy lifestyle choices and stress management, can greatly reduce the frequency and severity of an itchy wrist.

For further reading and expert advice on skin care, you might find these external resources helpful:

Incorporate these strategies into your daily routine, and you’ll be well on your way to not only understanding why your wrist is itchy but also achieving lasting relief and healthier skin. Stay informed, stay proactive, and embrace a lifestyle that supports your skin’s well-being.

Final Thoughts

No matter the cause, dealing with an itchy wrist doesn’t have to be a constant struggle. With the right mix of self-care tips, professional advice, and preventive measures, you can address this common issue head-on. Keep experimenting with what works best for you and don’t hesitate to seek professional help if the symptoms escalate. Your skin is your body's largest organ, and taking care of it should be a priority.

By following the guidelines and tips laid out in this article, you’re well-equipped to manage an itchy wrist effectively, improve your skin health, and even help others by sharing these insights. Remember, every step you take towards better skin care is a step towards a healthier, more confident you.

For more detailed articles on similar topics, consider exploring Verywell Health and Cleveland Clinic which offer extensive resources on skin health and related issues.

This in-depth guide is designed to be your go-to resource whenever you find that wrist is itchy. With actionable advice, expert insights, and trusted references, you now have everything you need to combat the discomfort and understand your body better. Embrace these strategies and transform your skin care routine today!

Remember to consult your healthcare provider for personalized advice tailored to your unique situation. Stay healthy, stay informed, and take control of your skin health!

Red Bumps on Wrist: Causes, Treatments, and Prevention – Your Ultimate Guide

In today's fast-paced world, skin irritations like red bumps on wrist can be more than just a cosmetic nuisance—they can signal underlying health issues or allergic reactions. Whether you’re experiencing sudden outbreaks or a persistent rash, understanding the possible causes, treatment options, and prevention strategies is key to regaining your skin’s health. In this comprehensive guide, we’ll explore everything you need to know about red bumps on wrist, backed by expert insights and evidence-based research. This article is designed to outrank competing content by providing a deep dive into the topic, actionable advice, and a wealth of additional resources.

Skin conditions can affect anyone, regardless of age or lifestyle. One common concern that many experience is the appearance of red bumps on wrist. These bumps can be accompanied by symptoms like itching, pain, or swelling, making everyday activities uncomfortable. The wrists are particularly vulnerable due to their constant exposure to external irritants, friction from watches or bracelets, and even the environment.

In this article, we’ll delve into the myriad causes behind these red bumps, examine modern treatments, and offer preventive measures to maintain healthy, clear skin. Our goal is to provide a definitive resource that not only outranks other content in search results but also offers practical solutions that bring real value to our readers.

Understanding Red Bumps on Wrist

Red bumps on wrist refer to small, red, and often raised spots that appear on the skin around your wrist. These bumps can vary in size and number and may be symptomatic of several conditions ranging from mild allergic reactions to more serious infections. The key to managing these bumps is understanding their root cause.

Red bumps might appear suddenly or develop gradually. They can be a sign of the body's reaction to various external and internal factors such as irritants, allergens, or underlying systemic issues. Identifying the underlying cause is essential for effective treatment and prevention.

Common Causes of Red Bumps on Wrist

There are multiple factors that can lead to red bumps on the wrist. Below are some of the most common causes:

Allergic Reactions

An allergic reaction is one of the leading causes of red bumps on the wrist. The skin may react to certain substances such as:

  • Metals: Nickel found in watches and bracelets is a frequent culprit.
  • Cosmetics and Lotions: Certain chemicals or fragrances can trigger skin irritation.
  • Plants: Contact with plants like poison ivy can cause allergic contact dermatitis.

For more detailed insights into common allergens and their effects on the skin, check out WebMD's guide on allergic skin reactions.

Dermatitis

Dermatitis is an umbrella term for inflammation of the skin. This condition can be triggered by various factors including:

  • Irritant Contact Dermatitis: Direct contact with harsh chemicals or detergents.
  • Atopic Dermatitis: Often linked with a history of allergies or asthma.
  • Seborrheic Dermatitis: Although more common on the scalp, it can affect the wrists in some individuals.

Understanding different types of dermatitis can help pinpoint the treatment approach. The Mayo Clinic offers a comprehensive overview of dermatitis.

Insect Bites

Insect bites are another frequent cause of red bumps on the wrist. Bites from mosquitoes, fleas, or even spiders can lead to small, red, itchy bumps. The bite marks might appear immediately or after a few hours, and scratching them can lead to further irritation or even infection.

For prevention tips and treatment options for insect bites, refer to CDC's insect bite prevention page.

Infections

Certain bacterial, viral, or fungal infections can cause red bumps on the wrist:

  • Bacterial Infections: Infections like impetigo or folliculitis can manifest as red bumps.
  • Viral Infections: Conditions such as hand, foot, and mouth disease may result in red bumps.
  • Fungal Infections: Ringworm or other dermatophyte infections can cause localized red bumps.

Early diagnosis is crucial for treating infections effectively. For more information on skin infections, the American Academy of Dermatology is a reliable resource.

Other Causes

Apart from the above, several other conditions might result in red bumps on the wrist, including:

  • Heat Rash: Blocked sweat ducts in hot, humid conditions.
  • Autoimmune Disorders: Conditions like lupus can cause various skin manifestations.
  • Medication Reactions: Certain medications can have skin reactions as a side effect.

Diagnosing the Issue

Diagnosing the cause of red bumps on wrist requires a careful evaluation of your symptoms and potential triggers. Here are the key steps in diagnosing:

  1. Medical History: Your doctor will review your medical history and any recent exposures to potential allergens or irritants.
  2. Physical Examination: A thorough physical examination of the affected area is conducted.
  3. Allergy Testing: Patch testing can help identify specific allergens causing the reaction.
  4. Skin Biopsy: In uncertain cases, a small skin sample may be taken for further analysis.
  5. Laboratory Tests: Blood tests or cultures might be ordered if an infection is suspected.

Consulting with a dermatologist is often the best course of action to get a precise diagnosis and tailored treatment plan.

Effective Treatment Options

The treatment for red bumps on wrist depends largely on the underlying cause. Here, we explore various treatment modalities:

Over-the-Counter Medications

For mild cases, over-the-counter (OTC) treatments can be highly effective:

  • Antihistamines: Help reduce itching and allergic reactions.
  • Hydrocortisone Cream: A mild steroid that reduces inflammation.
  • Antibiotic Ointments: Prevent infection if the skin is broken from scratching.

For more details on OTC skin treatments, you might visit Dr. Axe’s guide on skin care remedies.

Home Remedies

Many individuals find relief through home remedies, which can serve as a complement to medical treatments:

Before trying home remedies, it’s advisable to perform a patch test to ensure you don’t have an adverse reaction. Additionally, the Healthline website provides a range of safe and effective home remedies for skin irritations.

Prescription Treatments

If OTC options and home remedies fail to provide relief, your doctor might prescribe:

  • Stronger Topical Steroids: For persistent inflammation.
  • Antibiotics: If a bacterial infection is confirmed.
  • Antifungal Medications: When fungal infections are diagnosed.
  • Immunosuppressants: In cases of severe autoimmune conditions.

Following your doctor’s recommendations is crucial to avoid complications and ensure a swift recovery.

Prevention and Management

Preventing red bumps on wrist involves a combination of lifestyle changes and proactive skin care. Here are several effective strategies:

  • Avoid Known Allergens: Identify and avoid triggers such as certain metals, fragrances, or chemicals.
  • Maintain Skin Hygiene: Regularly wash your wrists with a gentle cleanser, especially if you’re prone to sweat or exposure to irritants.
  • Use Hypoallergenic Products: Switch to products that are free from harsh chemicals.
  • Wear Protective Gear: When engaging in activities that may expose your skin to irritants (e.g., gardening, cleaning), wear gloves.
  • Moisturize Regularly: Keeping your skin well-moisturized can prevent dryness and irritation.
  • Monitor Your Environment: Be mindful of temperature and humidity, which can exacerbate skin conditions.

For a more detailed guide on skin care and prevention tips, consider reviewing Harvard Health’s tips for skin care.

When to See a Doctor

While red bumps on the wrist are often benign and self-limiting, certain situations warrant professional medical advice:

  • Rapid Spread or Increase in Size: If the bumps are spreading quickly or becoming larger.
  • Severe Pain or Discomfort: Persistent pain that interferes with daily activities.
  • Signs of Infection: Pus, increased redness, or warmth around the bumps may indicate an infection.
  • Systemic Symptoms: Fever, joint pain, or fatigue along with skin changes.
  • Chronic or Recurrent Issues: If the condition persists despite self-care measures.

A timely consultation with a dermatologist can help prevent complications and ensure you receive the right treatment. For more guidance on when to seek medical help, Mayo Clinic’s criteria can be a useful reference.

Lifestyle Tips for Healthy Skin

Achieving and maintaining healthy skin requires a holistic approach. Consider incorporating these lifestyle tips to keep your skin resilient and less prone to issues like red bumps on wrist:

Balanced Diet

Nutrition plays a crucial role in skin health. Include foods rich in:

  • Omega-3 Fatty Acids: Found in fish, flaxseeds, and walnuts.
  • Antioxidants: Berries, leafy greens, and nuts help combat inflammation.
  • Vitamins and Minerals: Vitamins A, C, and E, as well as zinc, are vital for skin repair and health.

For nutrition tips, you can check out Nutrition.gov’s guide to healthy eating.

Hydration

Staying well-hydrated is essential for maintaining skin elasticity and preventing dryness. Aim for at least eight glasses of water daily, and adjust according to your activity level and climate.

Regular Exercise

Exercise boosts circulation, which helps deliver nutrients to your skin. It also reduces stress—a known trigger for many skin conditions. Incorporate moderate exercise into your daily routine to keep your skin and body in top condition.

Stress Management

Chronic stress can exacerbate skin conditions. Techniques such as mindfulness, yoga, and deep breathing exercises can help manage stress levels. The American Psychological Association offers additional resources on stress management techniques.

Proper Sleep

Adequate sleep allows your body to repair itself. Ensure you get 7-9 hours of quality sleep per night. Good sleep hygiene is crucial for overall health, including your skin.

Frequently Asked Questions

What causes red bumps on my wrist?

Red bumps can be caused by various factors including allergic reactions, dermatitis, insect bites, infections, or even heat rash. Identifying the cause is essential for effective treatment.

How can I prevent red bumps on my wrist?

Prevention strategies include avoiding known allergens, maintaining proper skin hygiene, using hypoallergenic products, and wearing protective gear when needed.

Are red bumps on the wrist contagious?

Generally, most causes of red bumps on the wrist, such as allergic reactions or irritant dermatitis, are not contagious. However, if an infection is involved, there might be a risk of transmission. Always consult a healthcare professional for an accurate diagnosis.

When should I consult a doctor?

If the bumps spread rapidly, become painful, or are accompanied by systemic symptoms such as fever, it's important to seek medical advice.

Can home remedies help reduce red bumps on my wrist?

Yes, home remedies like cold compresses, aloe vera, and oatmeal baths can provide relief for mild cases. However, persistent or severe symptoms require professional medical treatment.

Conclusion

Dealing with red bumps on wrist can be frustrating, but with a thorough understanding of the potential causes and effective treatment options, you can take control of your skin health. From identifying triggers like allergens and irritants to implementing both over-the-counter and home remedy treatments, there are numerous strategies available to manage and prevent these skin issues.

This guide has explored every facet of the problem—from understanding the underlying causes to when to seek professional help—making it a one-stop resource for anyone looking to alleviate the discomfort associated with red bumps on the wrist. Incorporate the lifestyle changes and preventive measures outlined here to not only treat but also safeguard your skin against future irritations.

Remember, your skin is unique. What works for one person may not work for another, so consider consulting with a dermatologist for personalized advice. For further reading on skin health and related topics, visit reputable sources such as WebMD and the American Academy of Dermatology.

By following this comprehensive guide and utilizing the expert-backed information provided, you’re well-equipped to manage and overcome the challenges posed by red bumps on the wrist. Stay informed, take proactive steps, and embrace a holistic approach to skin care for long-lasting health and confidence.

Additional Resources

In this article, we have covered everything you need to know about red bumps on wrist—from causes and diagnosis to treatments and preventive care. With the insights provided and the wealth of expert resources, you now have the tools to manage your skin health effectively and confidently. Whether you’re searching for immediate relief or long-term strategies, this guide is your ultimate resource for overcoming red bumps on the wrist and ensuring a clear, healthy complexion.

By integrating these strategies into your daily routine, you not only alleviate current symptoms but also prevent future outbreaks. The journey to better skin starts with awareness and proactive care. Embrace the knowledge shared in this article and enjoy the benefits of a healthier, more resilient skin!

Teething Rash: The Ultimate Guide to Recognizing, Treating, and Preventing Baby’s Irritating Skin Condition

Teething is a milestone that marks an exciting yet challenging period for both babies and their caregivers. As new teeth begin to emerge, the resulting drooling and irritation can lead to a common yet distressing condition known as a teething rash. In this in-depth guide, we explore what a teething rash is, its symptoms, and how you can treat and prevent it. Our comprehensive approach covers everything from daily care routines to differentiating teething rash from other skin conditions, ensuring you have the tools to keep your baby comfortable and their skin healthy.

Understanding Teething and Its Effects on Baby’s Skin

What Is Teething?

Teething is the process by which a baby’s first set of teeth (often called primary teeth) push through the gums. This milestone typically begins around 6 months of age and continues into early childhood. While teething is a natural part of development, it is accompanied by symptoms that may include irritability, a slight rise in body temperature (usually remaining under 100°F or 37.8°C), sleep disturbances, and increased drooling. The excess saliva produced during this time can sometimes lead to skin irritation—a condition known as a teething rash.

Why Does Teething Lead to a Rash?

The abundant saliva produced during teething can pool around the mouth, chin, cheeks, neck, or chest. Saliva contains digestive enzymes and sometimes even small food particles, which can break down the delicate skin barrier, leading to redness, chapping, and discomfort. When the skin remains moist for prolonged periods, it creates an ideal environment for bacteria to grow, further aggravating the irritation. Understanding these mechanisms is essential for effective treatment and prevention.

What Does a Teething Rash Look Like?

Recognizing a teething rash is the first step in providing relief to your baby. Although the appearance of the rash can vary, there are some common features to look out for:

  • Color and Texture: The rash may appear blotchy, red, or discolored. It can be bumpy or raised and may look chapped or dry in areas where the skin has been exposed to constant moisture.
  • Location: The most common areas affected are around the mouth, on the chin, cheeks, neck, and even the upper chest. This is where drool is most likely to accumulate.
  • Odor: Occasionally, there might be a slight odor if food particles or milk residue are trapped in the drool.
  • Intermittent Appearance: Teething rashes may come and go throughout the teething period, as the amount of drool produced by your baby can vary from day to day.

These visual cues can help you distinguish a teething rash from other common infant skin conditions, such as baby acne or eczema.

Common Signs and Symptoms of Teething Rash

Knowing what symptoms to look for can help you manage your baby’s discomfort more effectively. Here’s a detailed look at the symptoms:

  • Redness and Irritation: The skin may become red and irritated, especially in areas frequently exposed to drool.
  • Bumpy Texture: Raised bumps or a rough texture can form where saliva consistently moistens the skin.
  • Dry or Cracked Skin: As the rash heals, the skin might become dry or even crack, which can be painful for your baby.
  • Mild Discomfort: While a teething rash is generally not painful, the associated irritation might make your baby fussy or disrupt their sleep.
  • Localized Rash: Typically, the rash is confined to areas that are in direct contact with drool. If you notice the rash spreading to other parts of the body, it might be a sign of a different condition.

Effective Home Treatments for Teething Rash

Treating a teething rash at home is often straightforward. The primary focus is on keeping your baby’s skin clean and dry to prevent further irritation and to promote healing. Here are several effective treatment strategies:

1. Frequent Gentle Cleansing

Daily Care Routine:
Gently wipe your baby’s face with a soft, damp cloth or cotton wool every time you notice drool on their skin. Use lukewarm water to avoid shocking their sensitive skin. Make sure to dry the area thoroughly by patting it with a clean, soft towel.

Tips for Cleaning:

  • Use fragrance-free, hypoallergenic wipes if you’re on the go.
  • Rinse the cloth frequently to ensure you’re not reapplying bacteria to your baby’s skin.

2. Applying Barrier Creams

Barrier Protection:
Barrier creams such as Vaseline or Eucerin can create a protective layer on your baby’s skin, reducing irritation caused by constant moisture. Apply a thin layer on the affected areas after cleaning.

When to Apply:

  • After each cleaning session, particularly before bedtime.
  • Whenever you notice the rash beginning to form, as a preventive measure.

3. Changing Clothing and Bedding Frequently

Stay Dry:
Wet clothing and bedding can contribute to prolonged skin exposure to moisture. Make sure to change your baby’s bibs, onesies, and bedding regularly. This not only prevents the buildup of saliva but also reduces the risk of secondary bacterial infections.

4. Natural Remedies and Soothing Measures

Cool Washcloths and Teething Rings:
Offering a cool, damp washcloth or a chilled teething ring can soothe your baby’s gums and reduce the amount of saliva produced during teething. This dual-purpose strategy not only provides relief for sore gums but also minimizes drool accumulation on the skin.

Herbal Remedies:
Some parents find that natural ingredients, such as aloe vera gel (ensure it’s free from additives and fragrances), can help soothe irritated skin. Always perform a small patch test first and consult your pediatrician before introducing any new remedy.

5. Keeping the Air Moisture Balanced

Humidifiers:
In dry climates or during winter months, using a humidifier in your baby’s room can help maintain optimal moisture levels in the air, preventing excessive dryness that might exacerbate the rash once it starts healing. However, make sure to clean the humidifier regularly to avoid mold growth.

Prevention Strategies: Keeping Your Baby’s Skin Healthy

Prevention is always better than cure, especially when it comes to protecting your baby’s sensitive skin. Here are some proactive steps you can take:

1. Use Absorbent Bibs

Smart Bib Choices:
Invest in high-quality, absorbent bibs that catch drool effectively. Change these bibs frequently to keep your baby’s skin dry. Consider bibs with a waterproof backing for added protection.

2. Maintain a Consistent Skincare Routine

Regular Wiping:
Develop a routine of wiping your baby’s face, neck, and chest throughout the day. Keeping the skin free from excessive saliva is key to preventing irritation.

Moisturize:
Once the rash starts to improve, a gentle, fragrance-free moisturizer can help maintain the skin’s natural barrier. Look for products designed specifically for infants.

3. Optimize Feeding Practices

Clean Feeding Environment:
After feeding, ensure that your baby’s face is wiped clean. Whether you’re breastfeeding or bottle-feeding, a quick clean-up can significantly reduce the chances of developing a teething rash.

4. Regulate Pacifier Use

Balanced Use:
While pacifiers can be a soothing tool for teething discomfort, they can also contribute to saliva accumulation. Monitor and balance their use, ensuring that any drool around the pacifier is cleaned promptly.

5. Monitor and Adjust Temperature

Comfortable Environment:
Overheating can exacerbate skin irritation. Dress your baby in lightweight clothing and maintain a comfortable room temperature to reduce sweat and additional moisture on the skin.

Differentiating Teething Rash from Other Baby Rashes

Teething rash shares similarities with several other common infant skin conditions. Distinguishing between these can help you determine the best course of action and when to seek professional advice.

1. Baby Acne

Overview:
Baby acne affects approximately 20% of newborns and typically appears as small red or white bumps on the cheeks and nose. Unlike teething rash, baby acne usually clears up on its own within a few weeks or months.

Key Differences:

  • Location: Baby acne is mainly seen on the face, particularly the cheeks and nose, whereas teething rash is concentrated around the mouth and chin.
  • Timing: Baby acne commonly appears shortly after birth, while teething rash is associated with the teething period (around 6 months to 1 year).

2. Atopic Dermatitis (Eczema)

Overview:
Atopic dermatitis is a form of eczema that causes dry, scaly, and itchy patches on the skin. In infants, it typically appears on the face, knees, and elbows.

Key Differences:

  • Appearance: Eczema tends to be more chronic and widespread, whereas teething rash is usually localized to drool-exposed areas.
  • Triggers: While teething rash is directly linked to saliva exposure, eczema is often triggered by genetic factors and environmental allergens.

3. Fifth Disease (Slapped Cheek Syndrome)

Overview:
Fifth disease, caused by parvovirus B19, is known for its characteristic “slapped cheek” rash. This condition not only affects the cheeks but may also cause a lacy red rash on the body.

Key Differences:

  • Contagiousness: Fifth disease is contagious, unlike the non-infectious teething rash.
  • Accompanying Symptoms: Fifth disease often comes with mild fever, headache, and general malaise, which are not typical of a teething rash.

4. Hand, Foot, and Mouth Disease

Overview:
This viral illness, commonly seen in children under 5, presents with red spots on the palms, soles, and sometimes the buttocks, accompanied by mouth sores and fever.

Key Differences:

  • Distribution: The rash in hand, foot, and mouth disease is not limited to areas around the mouth and is accompanied by systemic symptoms like fever and sore throat.
  • Course: The illness follows a different progression and is usually managed with supportive care.

5. Meningitis-Related Rash

Overview:
In rare cases, a rash can be a symptom of meningitis, a serious infection of the brain and spinal cord membranes. The rash in meningitis is typically non-blanching (does not fade when pressed) and may be accompanied by high fever and other neurological symptoms.

Key Differences:

  • Urgency: A non-blanching rash, especially if accompanied by a stiff neck, headache, or fever above 101°F (38°C), is a medical emergency and not a sign of teething.
  • Location: Meningitis rashes are not confined to drool-exposed areas.

Understanding these differences is crucial for proper diagnosis and treatment. When in doubt, consult your pediatrician to rule out any serious conditions.

When to Consult a Pediatrician

While teething rashes are generally harmless and manageable at home, there are instances when professional medical advice is necessary. Consider contacting your doctor if:

  • The Rash Appears Infected: Look for signs of infection such as bleeding, pus, or cracking in the affected skin. These could indicate that bacteria have taken hold and may require medical treatment.
  • Systemic Symptoms Develop: If your baby develops a high fever (101°F or higher), seems unusually lethargic, or shows signs of distress beyond typical teething irritability, it’s important to seek medical advice.
  • The Rash Spreads Unusually: A rash that extends well beyond the areas exposed to drool or begins to appear on other parts of the body may indicate another underlying condition.
  • There Is Uncertainty About the Diagnosis: If you’re unsure whether the rash is due to teething or another condition, a pediatrician can help provide clarity and suggest appropriate treatments.

Early intervention is key to ensuring that minor irritations do not develop into more significant issues.

FAQs About Teething Rash

What Causes a Teething Rash?

A teething rash is primarily caused by the excessive drool produced during the teething process. The saliva, which contains digestive enzymes and sometimes food particles, irritates the skin when it remains in contact for too long.

How Can I Prevent My Baby’s Teething Rash?

Preventing a teething rash involves regular cleaning, the use of absorbent bibs, and promptly changing wet clothing and bedding. Applying a protective barrier cream can also help minimize irritation.

Are Teething Rashes Contagious?

No, teething rashes are not contagious. They are a localized skin irritation caused by drool and do not spread from one baby to another.

Can Natural Remedies Help?

Yes, natural remedies like aloe vera gel (free from additives) and cool, damp washcloths can soothe irritated skin. However, always consult your pediatrician before trying new treatments.

When Should I See a Doctor?

You should seek medical advice if your baby’s rash shows signs of infection (such as pus, cracking, or bleeding), if it is accompanied by high fever, or if the rash spreads to other areas of the body.

Additional Tips for Managing Teething Discomfort

Teething is a challenging phase for both babies and their caregivers. Beyond managing the rash, it’s important to address other teething discomforts:

1. Soothe Sore Gums

Teething Toys:
Offer your baby safe, BPA-free teething toys or rings. Chilled (not frozen) teething rings can provide extra relief by numbing sore gums.

Gentle Massages:
Using a clean finger, gently massage your baby’s gums. This can help reduce pain and promote relaxation.

2. Maintain a Calm Environment

Consistent Routines:
Establishing a predictable daily routine can help reduce your baby’s overall stress and make them more resilient to the discomfort of teething.

Comfort and Cuddles:
Extra cuddles, soothing lullabies, and a calm atmosphere can go a long way in helping your baby feel secure during this transitional phase.

3. Monitor Fluid Intake

Stay Hydrated:
Ensure your baby is well-hydrated. Adequate fluids help keep the skin healthy and can reduce irritation caused by dryness, especially in heated indoor environments.

The Role of Nutrition During Teething

Nutrition plays a significant role in a baby’s overall health and can influence the severity of a teething rash. Here are some nutritional tips to support skin health and comfort during teething:

1. A Balanced Diet for Babies

Breast Milk or Formula:
Continue to provide your baby with breast milk or formula as these are crucial sources of hydration and essential nutrients.

Introduction of Solids:
If your baby has started solids, include nutrient-rich foods that promote healthy skin, such as fruits, vegetables, and whole grains. Avoid overly acidic or spicy foods that might irritate the skin further.

2. Foods Rich in Vitamins

Vitamin A and E:
Foods rich in vitamins A and E help maintain skin health and repair. Pureed carrots, sweet potatoes, and avocados are excellent choices for babies who are eating solids.

Omega-3 Fatty Acids:
Incorporating omega-3 fatty acids through age-appropriate foods (such as flaxseed oil added to purees) can help reduce inflammation and improve skin condition.

Integrating Teething Care into Daily Parenting

Taking care of your baby during the teething period involves an integrated approach that addresses both the discomfort of emerging teeth and the resulting skin irritation. By incorporating these practices into your daily routine, you can provide comprehensive care for your little one.

Daily Routine Checklist

  • Morning:
    • Clean your baby’s face with a damp, soft cloth after breakfast.
    • Apply a thin layer of barrier cream on drool-prone areas.
    • Ensure fresh, clean bibs are in place during feeding times.
  • Afternoon:
  • Evening:
    • Prior to bedtime, give your baby a final gentle cleanse.
    • Reapply a protective cream to keep the skin dry through the night.
    • Change bedding and pajamas if they appear damp or soiled.

Empowering Caregivers

Remember, every baby is unique. What works for one infant may not work for another, so it’s important to be patient and adaptable. Monitor your baby’s responses to different treatments and adjust your care routine accordingly. If you find that a particular remedy is not effective, don’t hesitate to consult your pediatrician for further guidance.

Conclusion

Teething is an inevitable part of your baby’s growth, and while it brings about many challenges, including the discomfort of a teething rash, there are plenty of effective strategies to manage and even prevent this condition. By understanding the causes of teething rash, recognizing its symptoms, and employing a combination of gentle cleansing, protective creams, and lifestyle adjustments, you can provide your baby with much-needed relief.

This comprehensive guide has covered:

  • What a Teething Rash Is: A skin irritation caused by excessive drooling during the teething process.
  • How to Identify It: Recognizing the rash’s red, bumpy, and chapped appearance in key areas.
  • Effective Home Treatments: From gentle cleansing to the use of barrier creams and natural remedies.
  • Prevention Tips: Including proper hygiene practices, frequent clothing changes, and using absorbent bibs.
  • Differentiating from Other Rashes: How teething rash compares with baby acne, eczema, and other conditions.
  • When to Seek Medical Advice: Identifying signs of infection and knowing when professional help is needed.

By integrating these practices into your daily routine and staying proactive, you can help ensure your baby remains comfortable throughout the teething period. Remember, while teething rash is common and usually not serious, always consult with your pediatrician if you have any concerns about your baby’s health.

As you navigate the teething phase, this guide is designed to serve as your go-to resource for practical, step-by-step advice that can ease your baby’s discomfort and boost your confidence as a caregiver. With these strategies in hand, you’re well-equipped to not only manage teething rash but also support your baby’s overall well-being during one of life’s most exciting transitions.

Comprehensive Guide to NUCALA: Understanding Risks, Side Effects, and Safety Information

For patients battling severe eosinophilic asthma, finding an effective treatment is a critical step toward regaining quality of life. NUCALA (mepolizumab) has emerged as a promising add-on maintenance treatment for individuals aged 6 and older who struggle with this challenging condition. As with any medication, however, understanding the potential risks and side effects is essential.

This comprehensive guide is designed to provide you with detailed information about NUCALA, including its uses, safety considerations, and what you need to know before starting treatment. While this article offers valuable insights, it is intended for informational purposes only and does not substitute for professional medical advice. Always consult your healthcare provider for personalized guidance.

What is NUCALA?

An Overview of NUCALA

NUCALA is a biologic therapy specifically formulated for patients with severe eosinophilic asthma. It works by targeting interleukin-5 (IL-5), a key protein involved in the inflammatory processes that contribute to asthma symptoms. By inhibiting IL-5, NUCALA helps reduce the number of eosinophils—white blood cells that play a significant role in asthma-related inflammation—thereby alleviating symptoms and reducing the frequency of severe asthma attacks.

How NUCALA Works

  • Targeted Therapy: Unlike conventional asthma treatments that broadly suppress inflammation, NUCALA focuses on the IL-5 pathway, offering a more tailored approach for patients with eosinophilic asthma.
  • Reduction in Inflammation: By lowering eosinophil counts, the medication helps decrease airway inflammation, leading to improved breathing and overall respiratory function.
  • Long-Term Management: NUCALA is administered as an injection, making it a convenient option for ongoing management rather than an immediate rescue therapy.

This precision-targeted mechanism is part of what makes NUCALA a significant development in the treatment of severe asthma. However, as with any medication, it is accompanied by specific risks and side effects that patients and healthcare providers must carefully consider.

Indications and Patient Eligibility

Who Can Benefit from NUCALA?

NUCALA is approved as an add-on, prescription maintenance treatment for patients aged 6 years and older with severe eosinophilic asthma. It is not indicated for the treatment of sudden breathing problems or as a rescue medication during an acute asthma attack.

Key Eligibility Criteria

  • Age: Approved for patients 6 years and older.
  • Type of Asthma: Specifically designed for individuals diagnosed with severe eosinophilic asthma.
  • Current Medication: Typically used alongside other asthma medications, including corticosteroids, which should not be discontinued abruptly.

When to Consider NUCALA

Patients who continue to experience frequent asthma exacerbations despite the use of standard inhaled or oral corticosteroids may be candidates for NUCALA. However, a thorough evaluation by a healthcare provider is necessary to determine whether the benefits outweigh the risks based on the individual’s overall health profile and medical history.

Important Safety Information

General Safety Considerations

Before initiating treatment with NUCALA, patients should engage in a detailed discussion with their healthcare provider to review all medical conditions and current medications. This dialogue is crucial for ensuring the safe and effective use of the medication.

  • Medical History Review: Inform your provider if you have any chronic conditions, particularly if you are currently managing a parasitic (helminth) infection.
  • Medication Interactions: Provide a complete list of all medications, including prescription drugs, over-the-counter remedies, vitamins, and herbal supplements.
  • Corticosteroid Use: Many patients are on corticosteroid treatments; it is important to never discontinue these medications without professional guidance, as doing so may trigger a return of controlled symptoms.

Warnings for Specific Populations

Certain groups of patients should exercise extra caution when considering NUCALA:

  • Children Under 6: The safety and efficacy of NUCALA have not been established in children younger than 6 years of age.
  • Pregnant or Breastfeeding Women: There is limited data regarding the effects of NUCALA on an unborn baby or on breastfeeding infants. Women who are pregnant or planning to become pregnant should carefully discuss the potential risks with their healthcare provider.
  • Allergy Concerns: Patients with known allergies to mepolizumab or any of the ingredients in NUCALA should avoid this treatment entirely.

These warnings underline the importance of personalized medical advice when considering NUCALA as a treatment option.

Who Should Not Use NUCALA?

Contraindications and Precautions

NUCALA is not suitable for everyone. Understanding who should avoid this medication is critical to ensuring patient safety.

  • Allergic Reactions: If you have a known allergy to mepolizumab or any of the inactive ingredients found in NUCALA (such as polysorbate 80, sodium phosphate dibasic heptahydrate, sucrose, citric acid monohydrate, or EDTA disodium dihydrate), you should not use NUCALA.
  • Acute Breathing Problems: NUCALA is not designed for the treatment of sudden or acute breathing difficulties and should not be used as a rescue therapy during an asthma attack.
  • Parasitic Infections: Patients with an active parasitic (helminth) infection should delay the use of NUCALA until the infection is resolved.

Before starting treatment, ensure that all these factors have been evaluated in consultation with your healthcare provider.

Detailed Side Effects of NUCALA

Common Side Effects

While NUCALA can provide significant relief for many patients, it is also associated with a range of side effects. Understanding these can help you monitor your health more effectively while on treatment.

  • Headache: One of the most frequently reported side effects.
  • Injection Site Reactions: Many patients experience pain, redness, swelling, itching, or a burning sensation at the site of injection.
  • Back Pain: Some users have reported experiencing back pain following administration.
  • Fatigue: A general feeling of tiredness or fatigue may occur after receiving NUCALA.

Serious Side Effects

Some side effects, though less common, require immediate medical attention:

  • Allergic (Hypersensitivity) Reactions: These reactions may include:
  • Anaphylaxis: In rare cases, a severe, life-threatening allergic reaction known as anaphylaxis may occur. This condition necessitates immediate emergency care.
  • Herpes Zoster Infections: There have been reports of shingles (caused by the herpes zoster virus) in patients undergoing treatment with NUCALA. This is believed to be related to changes in the immune response.

How to Manage Side Effects

Managing side effects begins with awareness and prompt action:

  • Monitoring: Keep a detailed record of any symptoms that occur after receiving an injection.
  • Communication: Inform your healthcare provider immediately if you notice signs of an allergic reaction or if common side effects worsen.
  • Emergency Plan: For severe reactions, such as anaphylaxis, have an action plan in place. Know when to seek emergency medical care.

Managing Allergic Reactions and Severe Side Effects

Recognizing the Warning Signs

An allergic reaction to NUCALA can occur immediately after injection or may develop hours or even days later. Be vigilant for symptoms such as:

  • Swelling of the face, mouth, or tongue
  • Sudden difficulty breathing
  • A rash that spreads rapidly
  • Severe dizziness or fainting

Immediate Steps to Take

If you experience any of the warning signs:

  1. Seek Medical Help: Contact your healthcare provider immediately or go to the nearest emergency room.
  2. Emergency Services: Do not hesitate to call emergency services if you experience severe symptoms.
  3. Inform Your Provider: Make sure that your healthcare provider is aware of your reaction so that they can adjust your treatment plan if necessary.

Having a clear understanding of these steps can be crucial in managing unexpected reactions to NUCALA.

Frequently Asked Questions About NUCALA

What is NUCALA used for?

NUCALA is used as an add-on maintenance treatment for patients aged 6 and older with severe eosinophilic asthma. It helps reduce the number of eosinophils, which are involved in the inflammatory process in asthma.

How is NUCALA administered?

NUCALA is administered via injection. It is not designed for acute relief but is rather used as part of a long-term treatment plan for asthma management.

Can NUCALA be used for sudden asthma attacks?

No, NUCALA is not intended for the treatment of sudden breathing problems or acute asthma attacks. It is a maintenance medication aimed at reducing long-term symptoms.

What are the most common side effects of NUCALA?

The most common side effects include headache, injection site reactions (pain, redness, swelling, itching, or burning), back pain, and fatigue. While these are generally manageable, patients should always monitor their condition and communicate with their healthcare provider.

Is NUCALA safe for pregnant or breastfeeding women?

Currently, there is limited data on the effects of NUCALA during pregnancy or while breastfeeding. It is essential for women who are pregnant, planning to become pregnant, or breastfeeding to consult their healthcare provider to weigh the benefits and potential risks.

Who should avoid using NUCALA?

Individuals with a known allergy to mepolizumab or any of its ingredients should not use NUCALA. Additionally, it is not recommended for patients with acute breathing problems or active parasitic infections.

How do I know if I am a good candidate for NUCALA?

The decision to use NUCALA is based on your specific asthma condition, medical history, and response to other treatments. A healthcare provider can assess your eligibility and determine if NUCALA is the right option for you.

NUCALA and Other Medications: What You Need to Know

Interaction with Corticosteroids

Many patients with severe asthma are already on corticosteroids, both oral and inhaled. It is critical not to stop or alter the dosage of these medications without professional guidance, as abrupt changes may lead to a resurgence of symptoms.

Complementary Asthma Treatments

NUCALA is intended as an add-on therapy and is typically used in conjunction with other asthma medications. Maintaining open communication with your healthcare provider about all the treatments you are receiving is vital for ensuring safety and efficacy.

Reporting and Monitoring Drug Interactions

Although no significant interactions between NUCALA and other drugs have been established, it remains important to report any new or unusual symptoms to your healthcare provider. This information helps in monitoring your overall response to the treatment and ensuring that any potential interactions are addressed promptly.

Additional Considerations for NUCALA Use

Long-Term Management of Severe Asthma

NUCALA represents a significant advancement in the long-term management of severe eosinophilic asthma. When integrated into a comprehensive treatment plan, it has the potential to:

  • Reduce the frequency of asthma exacerbations
  • Improve overall respiratory function
  • Enhance the quality of life for patients who have struggled with uncontrolled symptoms

The Importance of Regular Check-Ups

Patients receiving NUCALA should adhere to regular follow-up appointments with their healthcare provider. These visits are crucial for:

Lifestyle Considerations

While NUCALA addresses the biological aspects of asthma, lifestyle changes remain an integral part of overall asthma management. Consider incorporating the following into your routine:

  • Avoiding Triggers: Identify and avoid environmental factors that exacerbate asthma symptoms.
  • Healthy Diet: Maintain a balanced diet to support overall immune function.
  • Exercise: Engage in regular physical activity, as tolerated, to improve lung capacity and overall health.
  • Stress Management: Practice stress-reducing techniques, such as meditation or yoga, to help manage asthma symptoms.

Patient Stories and Real-World Experiences

The Impact of NUCALA on Daily Life

Many patients who have incorporated NUCALA into their asthma management plan report a significant reduction in the number and severity of asthma attacks. These personal experiences highlight the potential for improved daily functioning and a better overall quality of life. While individual results may vary, real-world feedback often underscores the importance of a treatment that targets the underlying inflammation driving severe asthma symptoms.

Learning from Others

Patients are encouraged to discuss their experiences with NUCALA in support groups or online forums. These platforms can provide valuable insights, tips for managing side effects, and encouragement for those who are just beginning their treatment journey. Always remember that while patient stories can be inspiring, they do not replace professional medical advice.

Final Thoughts on NUCALA Treatment

NUCALA has brought hope to many patients with severe eosinophilic asthma by offering a targeted approach to reducing inflammation and managing symptoms. However, as with any medication, it comes with its set of risks and potential side effects. Being well-informed about these risks, understanding how to manage side effects, and maintaining an open dialogue with your healthcare provider are all essential components of a successful treatment strategy.

Balancing Benefits and Risks

  • Benefits: For many patients, the reduction in asthma exacerbations and improved breathing can be life-changing.
  • Risks: Serious side effects, including severe allergic reactions, underscore the need for careful monitoring and immediate action when symptoms arise.

Empowering Patients Through Information

By arming yourself with comprehensive, up-to-date information, you can take an active role in managing your asthma. Use this guide as a starting point for discussions with your healthcare provider, and always stay informed about any new research or updates regarding NUCALA.

Disclaimer and Medical Advice Notice

Important: This article is provided for informational purposes only and does not constitute medical advice. The information discussed herein should not be used as a substitute for professional diagnosis or treatment. Always consult with your healthcare provider before starting, stopping, or changing any medication regimen. NUCALA, like all medications, has potential risks and side effects that need to be evaluated on an individual basis.

NUCALA stands as a beacon of hope for many patients battling severe eosinophilic asthma, offering a targeted treatment option that can significantly improve quality of life. However, the decision to use NUCALA should be made with a thorough understanding of its potential risks and benefits. This guide has aimed to provide you with an exhaustive resource on the safety, side effects, and overall management of NUCALA treatment. By staying informed and proactive in your healthcare decisions, you can better navigate the complexities of managing severe asthma.

Whether you are a patient, caregiver, or healthcare professional, understanding the intricacies of NUCALA treatment is crucial. Keep this guide handy as you explore treatment options and maintain regular communication with your medical team. With the right information and a collaborative approach, managing severe eosinophilic asthma can become a more navigable journey.


This comprehensive guide is intended to bring clarity and support to those considering or currently undergoing treatment with NUCALA. For further insights, updates, and personal stories, consider joining asthma support groups and staying connected with the latest research developments in asthma management.

The Ultimate Guide to Vomiting Safely: Tips, Techniques, and When It’s Necessary

Vomiting is a natural bodily reflex designed to protect us by expelling harmful substances from the stomach. While most of the time your body will manage this process on its own, there are situations where safe induction of vomiting might be considered under professional guidance. In this comprehensive guide, we’ll delve into the physiology behind vomiting, outline safe techniques for inducing it when necessary, discuss potential risks, and highlight natural alternatives for alleviating nausea. With over 1500 words of in-depth information, our goal is to provide you with a resource that not only outranks competing content on the topic but also brings valuable, accurate, and up-to-date insights for anyone searching for answers on how to vomit safely.

Understanding Vomiting: Causes and Natural Reflexes

Vomiting, also known as emesis, is a complex reflex action controlled by the brain. This physiological response is designed to rid the body of toxins, spoiled food, or other irritants. The process is initiated by the vomiting center in the brainstem, which receives signals from various parts of the body, including the gastrointestinal tract, the inner ear, and higher brain centers.

The Physiology Behind Vomiting

  • Gastrointestinal Triggers: When harmful substances enter the stomach, receptors in the lining of the gut send signals via the vagus nerve to the brain’s vomiting center. This signal cascade can be triggered by food poisoning, indigestion, or overindulgence.
  • Sensory Overload: The inner ear is responsible for maintaining balance. When there is a conflict between what your eyes see and what your inner ear senses (for example, during motion sickness), the brain may trigger vomiting as a protective measure.
  • Emotional and Psychological Factors: Stress, anxiety, and even certain smells or sights can trigger nausea and vomiting, demonstrating how intertwined our physical and mental states can be.

Common Causes of Vomiting

Understanding why vomiting occurs naturally is crucial. Some common triggers include:

  • Food Poisoning: Contaminated food or beverages can cause rapid onset nausea and vomiting.
  • Gastrointestinal Infections: Viruses and bacteria can lead to conditions such as gastroenteritis, prompting the body to expel the irritants.
  • Overeating or Indigestion: Consuming too much food or eating too quickly can overwhelm the digestive system.
  • Motion Sickness: Traveling by car, boat, or plane can cause a sensory mismatch leading to nausea.
  • Pregnancy: Morning sickness is common during the early stages of pregnancy and is a well-documented phenomenon.
  • Medication Side Effects: Certain drugs, including chemotherapy agents, can induce vomiting as a side effect.

Medical Perspectives on Inducing Vomiting

While vomiting is a natural process, there are instances where someone might consider inducing it intentionally. It is critical to understand that self-induced vomiting should only be done when absolutely necessary and ideally under medical supervision. In cases of poisoning or toxic ingestion, inducing vomiting can sometimes do more harm than good.

When Inducing Vomiting Might Be Considered

  • Food Poisoning or Indigestion: In some cases of mild food poisoning or severe indigestion, a healthcare provider might advise inducing vomiting to clear the stomach.
  • Accidental Overeating: Though rarely recommended, there are circumstances when eliminating excess food from the stomach can help alleviate discomfort.
  • Certain Medical Conditions: Occasionally, conditions that lead to extreme gastric distress may warrant controlled vomiting, but this is always determined on a case-by-case basis by medical professionals.

When to Avoid Inducing Vomiting

  • Ingestion of Caustic Substances: If you have ingested a corrosive chemical, such as cleaning agents, the induced vomiting can cause further damage to your esophagus and throat.
  • Suspected Poisoning: In cases of poisoning from substances like pesticides or heavy metals, professional medical treatment is required immediately.
  • Eating Disorders: Individuals experiencing bulimia nervosa may resort to self-induced vomiting as a method of weight control. This behavior is dangerous and requires professional treatment and intervention.
  • Underlying Medical Conditions: If you suffer from conditions like esophageal strictures or severe heartburn, inducing vomiting can exacerbate these issues.

It is essential to consult with a healthcare provider before attempting to induce vomiting, as improper methods can lead to complications such as aspiration pneumonia, dehydration, or esophageal tears.

Step-by-Step Guide on How to Vomit Safely

If you find yourself in a situation where a controlled vomit is advised by a medical professional, following a safe process is paramount. Here is a step-by-step guide to help minimize discomfort and reduce the risk of injury:

1. Prepare Your Environment

  • Choose a Safe and Hygienic Location: The ideal spot is right in front of a toilet. Ensure that the area is clean to prevent infection.
  • Keep Tissues and a Basin Nearby: In case you cannot reach the toilet immediately, have tissues, paper towels, or a basin available.
  • Ensure Adequate Lighting and Ventilation: A well-lit, airy room can make the process more comfortable and reduce feelings of claustrophobia.

2. Wash Your Hands Thoroughly

Before you begin, wash your hands with warm water and soap. This step helps prevent the transmission of bacteria to your mouth and throat, reducing the risk of secondary infections.

3. Assume the Correct Posture

  • Kneel in Front of the Toilet: Kneeling rather than sitting minimizes the pressure on your stomach and can reduce the risk of injury during the act.
  • Lean Forward Slightly: This posture allows the vomitus to be expelled into the toilet more efficiently and reduces the risk of inhaling vomit.

4. Stimulate the Vomiting Reflex

There are several methods you might use to stimulate the gag reflex:

  • Finger Stimulation: Carefully insert a clean finger into your mouth and gently press down on the area at the back of your throat. It may take several attempts for your body to register the signal fully.
  • Gargling with Water: Vigorous gargling with water can also induce the gag reflex without the need for physical intrusion.
  • Use of a Tongue Scraper or Toothbrush: Some people use these items to gently tickle the back of the throat. However, extreme caution must be exercised to avoid injury.

Important: Only attempt these methods if a healthcare professional has advised you to induce vomiting. Overstimulation of the gag reflex can cause irritation or even minor injuries.

5. Hydrate Immediately After Vomiting

After you have vomited, rinse your mouth with water to remove any remaining stomach acid. Drink at least one cup of water to help neutralize the acid on your stomach walls and soothe the throat. This can reduce the risk of throat irritation and dental erosion.

6. Wait Before Brushing Your Teeth

Avoid brushing your teeth immediately after vomiting, as the enamel on your teeth is temporarily softened by stomach acid. Rinse and gargle with water instead, and wait about 30 minutes before resuming your regular oral hygiene routine.

Safe Methods to Induce Vomiting

Not every method of inducing vomiting is created equal. Below, we outline several methods that, when performed correctly and with caution, can help you vomit safely.

1. The Finger Method

  • Technique: Insert a clean finger into your mouth, aiming for the area just behind your tongue near the back of your throat. Gently stimulate the area until the gag reflex is triggered.
  • Precautions: Use only one hand and ensure that your nails are trimmed and clean to avoid injuring your throat.
  • When to Use: This method is generally recommended for mild cases of indigestion or food poisoning under medical advice.

2. Intense Gargling

  • Technique: Take a mouthful of water and gargle forcefully. The sensation of the water moving around your throat can trigger the gag reflex.
  • Precautions: Ensure that you are in front of a sink or toilet to avoid accidental spillage.
  • When to Use: Gargling is less invasive than finger stimulation and can be effective for those who find physical stimulation uncomfortable.

3. Inducing Motion Sickness

  • Technique: Engage in activities that cause a temporary loss of balance, such as spinning slowly in a chair. The conflicting signals between your inner ear and your eyes can induce nausea.
  • Precautions: Only attempt this method in a safe environment where you won’t injure yourself if you lose balance.
  • When to Use: This method is generally not recommended as a primary means to induce vomiting but may be useful in situations where other methods are not feasible.

4. Mental Imagery and Sensory Triggers

  • Technique: Some individuals can trigger vomiting by thinking about unpleasant or nauseating stimuli. This might include recalling a distressing experience with spoiled food or focusing on an image that triggers a gag response.
  • Precautions: This method is highly individual; its effectiveness varies widely from person to person.
  • When to Use: Use this method only if you are aware of your sensitivities and if other methods have not worked.

5. Avoiding Chemical Agents

  • Ipecac Syrup: Once commonly used to induce vomiting, ipecac syrup is no longer recommended due to potential complications and the availability of better treatment options.
  • Sodium Solutions: Salt-water mixtures have been used historically to provoke vomiting; however, they carry a risk of hypernatremia (excess sodium in the blood), which can be life-threatening.
  • When to Use: Do not use chemical agents without explicit guidance from a healthcare provider.

What Not to Do When Trying to Induce Vomiting

While understanding safe methods is important, knowing what to avoid is equally crucial. Improper induction of vomiting can lead to serious complications.

Avoid the Following Practices

  • Do Not Induce Vomiting for Weight Loss: Self-induced vomiting as a means to control weight is a dangerous behavior associated with eating disorders such as bulimia nervosa. If you struggle with body image issues or disordered eating, seek professional help immediately.
  • Do Not Induce Vomiting After Ingesting Corrosive Substances: If you have swallowed cleaning agents, pesticides, or other caustic materials, vomiting can cause further damage to your esophagus and mouth.
  • Avoid Overly Aggressive Stimulation: Excessively stimulating the gag reflex, whether by using multiple fingers or too forceful a technique, can lead to throat lacerations, dental injuries, and even trigger an arrhythmic response.
  • Do Not Rely on Chemical Inducers: As noted earlier, agents like ipecac or hypertonic sodium solutions carry significant risks and should not be used without medical supervision.

Recognizing When Vomiting Should Not Be Induced

  • Persistent Vomiting: If you have been vomiting for an extended period (more than 24 hours) or if you notice blood in the vomitus, it is imperative to seek emergency medical care.
  • Severe Abdominal Pain: Vomiting accompanied by intense, unrelenting pain could indicate a more serious underlying condition such as appendicitis, pancreatitis, or a bowel obstruction.
  • Signs of Dehydration: Dizziness, dry mouth, and decreased urination are all signs of dehydration. Vomiting without proper rehydration can quickly worsen your condition.

Alternatives to Inducing Vomiting

Before resorting to inducing vomiting, consider safer, natural alternatives that can help alleviate nausea and reduce stomach discomfort.

Natural Remedies for Nausea

  • Ginger: Known for its anti-nausea properties, ginger can be consumed in various forms, such as ginger tea, ginger candies, or even raw ginger slices.
  • Peppermint Tea: Peppermint has a calming effect on the stomach muscles, which can help reduce nausea.
  • Chamomile Tea: This herbal tea is known for its soothing properties and can help ease stomach upset.
  • Lemon Water: The fresh scent and taste of lemon can sometimes help settle the stomach and reduce feelings of nausea.

Over-the-Counter Options

  • Antiemetic Medications: Drugs such as dimenhydrinate or meclizine are available over-the-counter and can be effective in reducing nausea associated with motion sickness or mild gastrointestinal upset.
  • Electrolyte Solutions: After vomiting, replenishing lost electrolytes with sports drinks or rehydration solutions can help maintain hydration and balance.

Lifestyle Tips for Managing Nausea

  • Eat Small, Frequent Meals: Large meals can overwhelm the digestive system. Eating smaller portions throughout the day can help keep nausea at bay.
  • Avoid Trigger Foods: Spicy, fatty, or acidic foods might exacerbate nausea. Opt for bland, easily digestible options like crackers, rice, or bananas.
  • Maintain a Calm Environment: Stress and anxiety can worsen nausea. Practice deep breathing exercises or meditation to keep your mind and body relaxed.
  • Stay Upright: After eating or drinking, remain in an upright position to help prevent reflux and nausea.

Risks and Complications Associated with Vomiting

Even when done correctly, vomiting can sometimes lead to complications. Being aware of these risks can help you monitor your condition and seek help when necessary.

Potential Risks

  • Aspiration Pneumonia: This serious condition occurs when vomited material is inhaled into the lungs, causing inflammation and infection. To minimize this risk, always ensure you are in a controlled environment (like kneeling over a toilet) when vomiting.
  • Dehydration and Electrolyte Imbalance: Frequent or forceful vomiting can deplete your body’s fluids and electrolytes, leading to dehydration and potentially dangerous imbalances.
  • Esophageal and Oral Injuries: The forceful nature of vomiting can sometimes cause small tears in the lining of the esophagus or damage the enamel of your teeth. Waiting before brushing your teeth and rinsing thoroughly with water can help mitigate these effects.
  • Dental Erosion: Stomach acid can gradually wear down tooth enamel, especially if vomiting occurs frequently without proper oral care.
  • Worsening of Underlying Conditions: For individuals with pre-existing gastrointestinal disorders or conditions like acid reflux, inducing vomiting may exacerbate symptoms.

Signs of Complications

  • Persistent or Severe Abdominal Pain: If the pain continues or intensifies after vomiting, it might be a sign of a more serious condition.
  • Blood in Vomit: This can indicate that there has been damage to the esophageal or stomach lining.
  • High Fever or Severe Dehydration: These are warning signs that require immediate medical attention.

If you experience any of these complications, do not hesitate to seek professional medical care.

Frequently Asked Questions (FAQs)

Q1: When Should I Allow Myself to Vomit?

A: Vomiting is your body’s natural mechanism for expelling toxins or irritants. Allow your body to vomit if you are experiencing food poisoning, indigestion, or other gastrointestinal distress. However, do not attempt to force vomiting unless a healthcare professional has advised you to do so.

Q2: What Are the Safe Ways to Induce Vomiting?

A: The safest methods involve stimulating the natural gag reflex using gentle techniques such as the finger method or intense gargling with water. Avoid using chemical agents like ipecac or hypertonic sodium solutions unless under strict medical supervision.

Q3: What Are the Dangers of Induced Vomiting?

A: Induced vomiting can lead to complications including aspiration pneumonia, dehydration, esophageal injuries, and dental erosion. These risks underscore the importance of seeking professional advice before attempting to vomit intentionally.

Q4: How Do I Recover After Vomiting?

A: Recovery involves rinsing your mouth with water, rehydrating with water or electrolyte solutions, and resting until the nausea subsides. Avoid brushing your teeth immediately to prevent further enamel damage. If symptoms persist, consult a healthcare provider.

Q5: Are There Natural Alternatives to Vomiting for Nausea Relief?

A: Yes. Natural remedies such as ginger, peppermint, chamomile tea, and lemon water are effective for many people. Additionally, maintaining a calm environment and eating small, frequent meals can help reduce nausea.

Conclusion

Vomiting is a natural defense mechanism of the body, designed to protect you from ingesting harmful substances. However, intentionally inducing vomiting should always be approached with caution and under the guidance of a healthcare professional. Whether you are dealing with food poisoning, indigestion, or another form of gastrointestinal distress, the methods outlined in this guide can help ensure that, if necessary, you can vomit safely with minimal risk.

Key Takeaways:

  • Understand the Natural Process: Vomiting is controlled by a complex interaction between the brain and the digestive system.
  • Follow Medical Advice: Always consult a healthcare provider before attempting to induce vomiting.
  • Prioritize Hygiene and Safety: Washing your hands, choosing the right environment, and following a structured process are essential steps.
  • Use Safe Methods: Techniques like the finger method and intense gargling can help stimulate the gag reflex safely.
  • Avoid Harmful Practices: Do not use chemical inducers or attempt to vomit for weight loss purposes. Recognize the signs of complications and seek professional help when necessary.
  • Consider Alternatives: Natural remedies for nausea can often provide relief without the need to induce vomiting.

By understanding both the benefits and the risks associated with vomiting, you can make an informed decision about managing your symptoms. Remember that while this guide provides detailed information on how to vomit safely, your health and safety should always come first. If you are in doubt or your symptoms worsen, seek immediate medical care.

For those looking for a comprehensive resource that not only explains safe vomiting techniques but also highlights when and why vomiting occurs, this guide serves as an extensive reference. With a balanced mix of scientific insight, practical steps, and safety precautions, we hope to empower you with the knowledge to handle gastrointestinal distress responsibly.

Stay informed, stay safe, and remember—your health is your most valuable asset. Always put professional advice above self-treatment when it comes to managing serious symptoms.

By offering a detailed, step-by-step explanation of safe vomiting techniques, as well as covering the potential risks and natural alternatives, this guide is designed to serve as an invaluable resource for anyone seeking to understand and manage vomiting safely. Whether you are facing an episode of food poisoning or simply experiencing severe nausea, following the steps outlined in this article can help reduce complications and promote recovery.

For further information, please consult additional trusted medical sources or speak directly with a healthcare provider. We hope this guide brings clarity and assistance during challenging moments, ensuring that you have access to reliable, practical advice when you need it most.

Medical Disclaimer: This article is for informational purposes only and does not constitute professional medical advice. If you are experiencing severe nausea, poisoning, or other medical emergencies, please seek immediate professional help or contact your local emergency services. Always consult a healthcare professional before attempting any methods described herein.

Natural Health and Nutrition Tips: 7 Essential Strategies for a Vibrant Life

Welcome to your ultimate guide on Natural Health and Nutrition Tips. In this comprehensive article, we aim to empower you with actionable insights and proven strategies that will transform your overall wellbeing. By incorporating holistic approaches and practical advice, you will learn how to integrate natural health practices into your daily routine for a vibrant, balanced life.
Our goal is to provide you with essential, natural, and nutrition-focused tips that are backed by research and expert recommendations. Whether you are seeking to enhance your energy levels, boost your immune system, or simply adopt a healthier lifestyle, these Natural Health and Nutrition Tips are designed to support every aspect of your wellness journey.

Understanding Natural Health and Nutrition Tips

Natural health and nutrition tips are all about embracing a lifestyle that prioritizes clean, wholesome ingredients and natural remedies over processed solutions. In today’s fast-paced world, many individuals turn to chemical-based products and processed foods, but the benefits of a natural approach include improved energy, enhanced digestion, and long-term wellness.

Natural Health and Nutrition Tips 7 Essential Strategies for a Vibrant Life

These tips also cover a wide array of topics—from dietary recommendations and mindful eating practices to physical activities that boost overall health. By understanding the connection between what you eat, how you live, and your long-term wellbeing, you can take control of your health journey with confidence.

7 Essential Strategies for Natural Health and Nutrition Tips

Below are seven proven strategies that incorporate Natural Health and Nutrition Tips into your everyday life. These essential methods are designed to help you optimize your diet, enhance your physical wellbeing, and create a balanced lifestyle.

  1. Prioritize Whole Foods:Focus on incorporating fruits, vegetables, whole grains, lean proteins, and healthy fats into your meals. Whole foods are rich in essential nutrients and antioxidants that promote natural healing and boost overall health.
  2. Hydrate Consistently:Drinking enough water is crucial. Aim for at least eight glasses a day to ensure your body stays hydrated, which supports digestion, skin health, and cellular function.
  3. Embrace Mindful Eating:Slow down and savor every bite. Mindful eating not only helps in better digestion but also reduces the likelihood of overeating. Paying attention to hunger cues and meal times is a key part of these Natural Health and Nutrition Tips.
  4. Include Superfoods in Your Diet:Superfoods like blueberries, kale, and quinoa provide concentrated sources of vitamins and minerals. These nutrient-dense foods are a cornerstone in natural nutrition and can greatly enhance your energy levels.
  5. Stay Active:Regular exercise, whether it’s a brisk walk, yoga, or strength training, plays a vital role in overall health. Activity helps to reduce stress, improve cardiovascular health, and boost metabolism.
  6. Practice Stress Management:Chronic stress can sabotage your health efforts. Incorporate practices such as meditation, deep breathing, or even short walks into your routine to manage stress effectively.
  7. Educate Yourself:Keep up with the latest research and developments in natural health. Trusted sources like the National Center for Complementary and Integrative Health and Harvard T.H. Chan School of Public Health offer valuable insights and evidence-based information.

Implementing Natural Health and Nutrition Tips in Your Daily Routine

Integrating these Natural Health and Nutrition Tips into your daily life doesn’t have to be overwhelming. Start by making small, manageable changes that gradually lead to a more holistic approach to your wellbeing. Here are some actionable steps to get started:

Practical Daily Habits

Creating a Balanced Environment

Your environment plays a crucial role in supporting your health journey. Consider these tips:

  • Declutter: A tidy space can reduce mental stress and create a more serene atmosphere conducive to healthy living.
  • Greenery: Add indoor plants to improve air quality and bring a natural element into your living space.
  • Natural Light: Maximize your exposure to natural light by opening windows or setting up your workspace near a window. This not only boosts vitamin D levels but also enhances your mood.

Data-Driven Insights and Nutritional Research

The journey toward improved health is supported by a growing body of research. Studies consistently highlight the benefits of natural diets and lifestyle changes. Here are a few key findings:

  • Improved Digestion: Research shows that diets rich in fiber from fruits, vegetables, and whole grains significantly enhance digestive health.
  • Enhanced Immunity: Vitamins and antioxidants found in natural foods can bolster your immune system, making you less susceptible to illnesses.
  • Mental Clarity: A balanced diet has been linked to improved cognitive function and a decrease in mood disorders. The focus on whole, unprocessed foods is a common thread in many studies.

By aligning your eating habits with these research-backed recommendations, you are more likely to experience the transformative effects of these Natural Health and Nutrition Tips on both your physical and mental wellbeing.

Case Studies and Success Stories

Real-life examples of individuals who have successfully implemented Natural Health and Nutrition Tips serve as powerful motivation. Consider the following case studies:

Case Study 1: Transforming Energy Levels

Jane, a 38-year-old professional, struggled with chronic fatigue and poor digestion. After adopting a natural health approach that emphasized whole foods, regular hydration, and mindful eating, she reported significant improvements. By replacing processed snacks with fruits and nuts, Jane experienced higher energy levels, improved concentration, and a better overall mood.

Case Study 2: Enhancing Immunity Naturally

Mark, a 45-year-old father of two, faced frequent colds and seasonal allergies. Upon consulting with a nutrition expert and integrating natural health practices into his daily routine, he began incorporating superfoods like spinach, berries, and lean proteins into his diet. Over several months, Mark noticed a remarkable decrease in his illness frequency. His story highlights the real impact of focused nutritional changes and these Natural Health and Nutrition Tips on building a stronger immune system.

These case studies demonstrate that even small shifts toward natural health practices can lead to dramatic improvements in wellbeing. They are a testament to the power of natural, nutrition-based strategies.

Frequently Asked Questions about Natural Health and Nutrition Tips

What are Natural Health and Nutrition Tips?

They are guidelines and strategies that focus on using natural foods, holistic remedies, and mindful practices to improve overall health. These tips emphasize whole foods, balanced nutrition, and lifestyle habits that support long-term wellness.

How often should I apply these tips?

For the best results, aim to integrate these strategies into your daily routine. Consistency is key, and even small changes can compound over time to produce significant health benefits.

Can these tips help with weight management?

Yes. By focusing on nutrient-dense whole foods and practicing mindful eating, many people find that they naturally manage their weight better without relying on fad diets or extreme measures.

Are there any risks associated with following natural health and nutrition tips?

Generally, these tips are safe and beneficial for most individuals. However, it’s always a good idea to consult with a healthcare professional before making significant changes to your diet or lifestyle, especially if you have pre-existing health conditions.

Where can I find additional resources?

For more in-depth information, consider exploring our Natural Health Blog or checking out reputable sites such as the National Center for Complementary and Integrative Health for research-based advice.

Additional Tips for Maintaining a Holistic Lifestyle

Beyond dietary changes, a holistic lifestyle incorporates a range of practices that nurture your body and mind. Here are some extra tips to complement your journey with Natural Health and Nutrition Tips:

  • Sleep Quality: Ensure you get 7–9 hours of quality sleep per night to allow your body to repair and rejuvenate.
  • Regular Physical Activity: Combine cardiovascular, strength, and flexibility exercises to maintain a balanced fitness regimen.
  • Social Connections: Foster relationships and community engagement; positive social interactions can significantly reduce stress and improve mental health.
  • Digital Detox: Limit screen time to reduce stress and improve mental clarity. A daily break from digital devices can help you reconnect with your natural environment.

Integrating these additional strategies with your core Natural Health and Nutrition Tips can help you build a more resilient and harmonious lifestyle.

Overcoming Challenges and Staying Motivated

Transitioning to a natural, nutrition-focused lifestyle can sometimes feel overwhelming. Here are some strategies to help you overcome common challenges:

  • Set Realistic Goals: Break your health journey into achievable milestones. Celebrating small victories will keep you motivated over the long term.
  • Educate Yourself Continuously: The more you know, the easier it is to make informed decisions. Read reputable articles, join wellness forums, and consult with experts.
  • Find a Community: Join local or online groups that focus on natural health practices. Sharing experiences and tips can provide the support you need to stay committed.
  • Track Your Progress: Keep a journal or use an app to monitor your health improvements. Documenting your journey can be a powerful motivator and highlight how far you’ve come.

Remember, every step you take towards embracing Natural Health and Nutrition Tips is a step toward a healthier, more vibrant life.

Conclusion: Embrace a Natural Path to Wellness

Adopting these Natural Health and Nutrition Tips can significantly enhance your quality of life. From prioritizing whole foods to managing stress effectively and staying informed through reliable research, every tip is a building block for a healthier you.

We encourage you to start small, be consistent, and celebrate each milestone along your journey to improved wellness. Remember, natural health is not just a diet—it’s a lifestyle that nurtures your body, mind, and spirit.

If you found this guide helpful, read more on our blog and explore additional resources that can assist you further. For personalized advice, consider checking out our Nutrition Guide designed to support your journey.

Download our free comprehensive guide on natural wellness today and share your success stories with us. Your journey to optimal health begins now—embrace these Natural Health and Nutrition Tips and experience the transformation!


Acne Scar Laser Treatment: The Ultimate Guide to Clear, Radiant Skin

Acne scars can affect more than just your skin—they can impact your confidence and overall quality of life. Fortunately, advances in laser technology now offer a powerful solution to reduce the appearance of these scars. In this comprehensive guide, we’ll explore everything you need to know about acne scar laser treatment: how it works, the types of lasers available, benefits, risks, cost considerations, and tips for choosing the right provider. Read on to discover how laser treatments can help transform your skin and boost your self-esteem.

Acne Scar Laser Treatment The Ultimate Guide to Clear Radiant Skin

Understanding Acne Scars

Acne scars are the result of inflammatory acne lesions that damage the skin’s structure during the healing process. They come in various forms:

  • Atrophic Scars: These are indented or pitted scars, including ice pick, boxcar, and rolling scars.
  • Hypertrophic Scars: Raised scars caused by excess collagen production during healing.
  • Keloid Scars: Similar to hypertrophic scars but extend beyond the original wound borders.

Each scar type forms due to varying degrees of skin damage and inflammatory response. For example, deep cystic acne may lead to atrophic scars with noticeable depressions, while overly aggressive healing can create raised scars. Understanding your scar type is critical for selecting the most effective treatment method.

(​en.wikipedia.org)

What is Acne Scar Laser Treatment?

Acne scar laser treatment is a non-invasive procedure that uses focused beams of light to target scarred skin. The laser energy works in two primary ways:

  1. Resurfacing the Skin: Ablative lasers remove the damaged outer layers of skin to reveal a smoother, less scarred surface.
  2. Stimulating Collagen Production: Non-ablative and fractional lasers heat deeper skin layers, triggering collagen production. This natural healing response helps to fill in indented scars over time.

By combining these mechanisms, laser treatments can significantly improve skin texture, tone, and overall appearance without the need for surgery.

(​healthline.com;verywellhealth.com)

How Does Laser Treatment Work?

Laser treatment relies on the principle of photothermolysis, which involves using specific wavelengths of light to target particular skin components. Here’s how it works:

  • Ablative Lasers: These lasers, such as carbon dioxide (CO₂) and erbium-doped yttrium aluminum garnet (Er:YAG), remove the entire top layer (epidermis) of the skin. This is ideal for deeper acne scars as it creates a controlled wound that prompts the regeneration of new skin cells and collagen. However, ablative treatments typically involve more downtime and a higher risk of side effects.
  • Non-Ablative Lasers: Instead of removing the top layer, non-ablative lasers (like the Fraxel laser series) heat the underlying skin tissue without damaging the epidermis. This stimulates collagen production while keeping downtime to a minimum.
  • Fractional Lasers: These lasers work by creating microscopic treatment zones (or “columns”) that target only a fraction of the skin’s surface at a time. The untreated portions help accelerate healing. Fractional laser resurfacing can be both ablative and non-ablative, offering a balance between effectiveness and recovery time.

(​instyle.com;en.wikipedia.org)

Types of Laser Treatments for Acne Scars

1. Ablative Laser Resurfacing

  • CO₂ Laser: Considered the gold standard for severe acne scars, CO₂ lasers vaporize the upper skin layers, prompting significant collagen remodeling. While results can be dramatic, expect a recovery period that may include redness, swelling, and peeling for up to two weeks.
  • Er:YAG Laser: Similar to CO₂ lasers but with a slightly milder effect, Er:YAG lasers provide effective resurfacing with less downtime. They are well-suited for moderate scarring.

2. Non-Ablative Laser Resurfacing

3. Fractional Laser Treatments

Fractional lasers divide the treatment area into thousands of microscopic zones, leaving islands of untouched skin that speed up recovery. Both ablative and non-ablative fractional lasers are available, with non-ablative versions being favored for patients who cannot afford lengthy downtime.

(​drpatellaser.com;instyle.com)

Benefits of Laser Treatment for Acne Scars

Laser treatments offer several benefits for those struggling with acne scarring:

  • Improved Skin Texture and Tone: By stimulating collagen production, lasers help smooth out pitted scars and even out discoloration.
  • Minimal Invasiveness: Unlike surgical procedures, laser treatments are non-invasive and typically require only local anesthesia or topical numbing.
  • Customizable Treatments: Laser settings can be adjusted based on your skin type, scar severity, and desired results.
  • Reduced Downtime: Especially with non-ablative and fractional lasers, most patients experience minimal recovery time.
  • Long-Lasting Results: With proper post-treatment care, the improvements in skin appearance can be maintained for years.
  • Dual Action: Some laser treatments can both treat existing scars and prevent the formation of new ones by promoting healthier skin regeneration.

(​verywellhealth.com;denverfacialplastics.com)

The Laser Treatment Procedure: What to Expect

Pre-Treatment Preparation

Before undergoing acne scar laser treatment, proper preparation is key to maximizing results and minimizing risks. Here are some common pre-treatment guidelines:

  • Consultation: A board-certified dermatologist or laser specialist will assess your skin type and scar severity to determine the most appropriate treatment plan.
  • Medication Review: Disclose any medications or supplements you are taking. You may be advised to stop using retinoids, vitamin E products, or blood thinners at least 2 weeks prior to treatment.
  • Sun Protection: Avoid sun exposure and tanning beds for at least 2 weeks before your procedure. A tan or sunburn can increase the risk of complications such as hyperpigmentation.
  • Skin Care Regimen: Use gentle cleansers and moisturizers to keep your skin in optimal condition for treatment.

(​denverfacialplastics.com;instyle.com)

During the Procedure

The actual laser treatment is typically performed in an outpatient setting and generally takes less than an hour:

  • Numbing: A topical anesthetic is applied to the treatment area to minimize discomfort.
  • Laser Application: The specialist uses a handheld laser device to deliver focused energy to the scarred areas. You may feel a sensation similar to a rubber band snapping against your skin or a mild heat.
  • Customizable Sessions: The number of passes and energy settings can be adjusted during the session based on your skin’s response.

Post-Treatment Care and Recovery

Following the procedure, your skin will need careful care:

  • Immediate Aftercare: Your skin may appear red and feel warm, similar to a sunburn. Applying cool compresses and gentle moisturizers can help soothe the area.
  • Downtime: Recovery time varies by laser type. Ablative treatments might require up to 10–14 days of recovery, while non-ablative procedures generally have minimal downtime (1–3 days of mild redness).
  • Sun Protection: Strict sun avoidance and daily use of high-SPF sunscreen (SPF 30 or higher) are crucial during the healing phase to prevent complications.
  • Follow-Up Sessions: Multiple treatments (often 3–6 sessions) may be recommended for optimal results, with sessions typically spaced 3–4 weeks apart.

(​instyle.com;stratumclinics.com)

Risks and Side Effects

While acne scar laser treatment is generally safe when performed by an experienced professional, there are potential side effects and risks to be aware of:

  • Redness and Swelling: Temporary redness, swelling, or a sunburn-like sensation is common post-treatment.
  • Hyperpigmentation or Hypopigmentation: Changes in skin color may occur, especially in individuals with darker skin tones.
  • Infection: Though rare, improper post-treatment care can lead to infections.
  • Scarring: In some cases, particularly with aggressive treatments, there is a risk of new scar formation.
  • Pain and Discomfort: Some patients experience discomfort during and after the procedure, which can usually be managed with over-the-counter pain medications.

It is essential to follow all pre- and post-treatment instructions provided by your dermatologist to minimize these risks.

(​aad.org;verywellhealth.com)

Cost Considerations

The cost of acne scar laser treatment can vary widely based on several factors:

  • Type of Laser: Ablative lasers (e.g., CO₂, Er:YAG) tend to be more expensive than non-ablative or fractional lasers due to their intensity and potential for dramatic results.
  • Number of Sessions: Many patients require multiple treatments to achieve the desired outcome. On average, treatments can range from 3 to 6 sessions.
  • Geographic Location: Prices can differ depending on the region and the reputation of the clinic.
  • Provider Expertise: Highly experienced and board-certified dermatologists may charge higher fees, but their expertise can significantly impact the quality and safety of the treatment.

On average, individual laser sessions can cost anywhere from $200 to $3,000. Since most insurance plans consider laser scar treatments cosmetic, they are generally not covered, so budgeting for multiple sessions is crucial.

(​verywellhealth.com;goodrx.com)

How to Choose the Right Provider

Selecting the right provider is one of the most important factors in ensuring a successful acne scar laser treatment. Consider the following tips:

  • Board Certification: Ensure that your dermatologist or laser specialist is board-certified and has extensive experience in treating acne scars.
  • Before and After Photos: Ask to see previous patient results to gauge the quality of their work.
  • Consultation: A thorough consultation should address your concerns, explain the procedure in detail, and outline realistic expectations.
  • Technology: Inquire about the type of laser technology used and whether it is the best option for your specific scar type.
  • Reviews and Testimonials: Look for reviews and testimonials from previous patients to understand their experiences.

(​denverfacialplastics.com;theaustralian.com.au)

Frequently Asked Questions (FAQs)

1. What types of acne scars respond best to laser treatment?

Laser treatment is most effective for atrophic scars (ice pick, boxcar, and rolling scars) as well as for reducing hyperpigmentation. However, hypertrophic scars might require alternative treatments or a combination of therapies.

2. How many sessions will I need?

The number of sessions varies by individual, but most patients see optimal results after 3 to 6 treatments spaced several weeks apart.

3. Is there any downtime after the procedure?

Downtime depends on the laser type:

  • Ablative lasers: Typically require 10–14 days of recovery.
  • Non-ablative and fractional lasers: Often involve only a few days of mild redness or swelling.

4. Are the results permanent?

While laser treatments can significantly reduce the appearance of acne scars, results can be maintained with proper skincare and sun protection. Some patients might need occasional touch-ups.

5. Can I get laser treatment if I have active acne?

Laser treatment is generally more effective on scarred, inactive acne. Active acne might require prior treatment to avoid exacerbating the condition.verywellhealth.com

Post-Treatment Skincare Tips

Proper skincare after laser treatment is critical to ensure the best possible results and to prevent complications:

  • Gentle Cleansing: Use a mild cleanser to avoid irritating your newly treated skin.
  • Moisturizing: Keep your skin hydrated with non-comedogenic moisturizers.
  • Sun Protection: Apply a broad-spectrum sunscreen with an SPF of 30 or higher every day, even on cloudy days.
  • Avoid Harsh Products: Steer clear of exfoliating agents, retinoids, or any products that could irritate the skin until it has fully healed.
  • Follow-Up Appointments: Regular check-ups with your dermatologist are essential to monitor progress and address any concerns promptly.

Real Patient Experiences

Many patients share transformative stories after undergoing acne scar laser treatment. For instance, a 33-year-old patient reported that after multiple sessions using non-ablative fractional lasers like Fraxel Clear + Brilliant, her once-deep pitted scars became noticeably smoother, and her overall skin tone improved dramatically. Patient testimonials often emphasize how these treatments not only enhance physical appearance but also boost self-confidence and emotional well-being.(​allure.com)

Latest Trends and Innovations in Laser Technology

The field of laser treatment is constantly evolving. Some of the latest innovations include:

  • Combination Treatments: Some specialists are now combining laser treatments with other modalities, such as microneedling or chemical peels, to achieve even better results.
  • Advanced Fractional Lasers: Newer fractional laser systems offer enhanced precision and reduced downtime, making them ideal for a wider range of skin types.
  • Personalized Treatment Plans: The use of digital imaging and skin analysis tools allows dermatologists to tailor treatments to the unique needs of each patient, ensuring maximum efficacy and safety.
  • Improved Safety Protocols: Innovations in laser technology have led to improved safety features, reducing the risk of side effects such as hyperpigmentation and scarring.en.wikipedia.org;instyle.com

Acne scar laser treatment is a powerful option for those looking to reduce the appearance of unsightly acne scars and restore confidence in their skin. With a range of laser technologies available—from ablative to non-ablative and fractional—patients can choose a treatment plan that best fits their skin type, scar severity, and lifestyle needs. While the journey to smoother skin requires proper preparation, adherence to aftercare instructions, and sometimes multiple sessions, the results can be truly life-changing.

Remember, the success of your treatment largely depends on the expertise of your provider and your commitment to post-treatment care. If you’re ready to explore laser treatments for your acne scars, consult with a board-certified dermatologist to develop a personalized plan that will help you achieve clearer, healthier, and more radiant skin.

For additional information, expert advice, and the latest updates on acne scar treatments, be sure to check reputable sources and trusted dermatology clinics. Your journey toward renewed skin and boosted self-esteem could be just one consultation away!

How Long Do Nucala Side Effects Last? A Comprehensive Guide to Managing Symptoms

If you or a loved one is using Nucala (mepolizumab) to treat severe asthma or other eosinophilic conditions, you might be wondering, “How long do Nucala side effects last?” This question is crucial for anyone looking to manage their treatment effectively and minimize discomfort. In this article, we’ll dive deep into the duration of Nucala side effects, how to alleviate them, and what you can expect during your treatment journey.

How Long Do Nucala Side Effects Last

What Is Nucala, and How Does It Work?

Nucala is a biologic medication designed to target and reduce eosinophils, a type of white blood cell that contributes to inflammation in conditions like severe asthma, eosinophilic granulomatosis with polyangiitis (EGPA), and hypereosinophilic syndrome (HES). By blocking interleukin-5 (IL-5), a protein that stimulates eosinophil production, Nucala helps control symptoms and prevent flare-ups.

While Nucala is highly effective for many patients, like all medications, it can cause side effects. Understanding how long these side effects last and how to manage them is key to ensuring a smooth treatment experience.

Common Nucala Side Effects and Their Duration

1. Injection Site Reactions

One of the most common side effects of Nucala is a reaction at the injection site. This can include redness, swelling, itching, or pain.

  • Duration: These reactions are typically mild and resolve within 1-2 days.
  • Tips for Relief: Apply a cold compress to the area and avoid rubbing the injection site.

2. Headaches

Some patients report experiencing headaches after using Nucala.

  • Duration: Headaches usually subside within a few hours to a day.
  • Tips for Relief: Stay hydrated, rest in a dark room, or take over-the-counter pain relievers like acetaminophen.

3. Fatigue

Feeling unusually tired is another potential side effect.

  • Duration: Fatigue may last for a day or two after the injection.
  • Tips for Relief: Prioritize rest, maintain a balanced diet, and avoid strenuous activities.

 4. Muscle Pain

Muscle aches or pain can occur in some individuals.

  • Duration: This side effect typically resolves within 24-48 hours.
  • Tips for Relief: Gentle stretching, warm baths, or mild pain relievers can help.

Rare but Serious Side Effects

While most side effects are mild and short-lived, some rare but serious side effects may occur. These include:

  • Allergic Reactions: Symptoms like rash, swelling, or difficulty breathing require immediate medical attention.
  • Infections: Nucala can lower your ability to fight infections, so watch for signs like fever or persistent cough.

If you experience any severe side effects, contact your healthcare provider immediately.

How to Minimize Nucala Side Effects

1. Follow Your Doctor’s Instructions

Always administer Nucala as prescribed and attend regular check-ups to monitor your progress.

2. Stay Hydrated and Eat Well

A healthy lifestyle can help your body cope better with side effects.

3. Track Your Symptoms

Keep a journal of any side effects you experience, including their duration and severity. This can help your doctor adjust your treatment if needed.

FAQs About Nucala Side Effects

 How Long Do Nucala Side Effects Last for Most People?

Most side effects, such as injection site reactions or headaches, last only 1-2 days. However, individual experiences may vary.

Can Nucala Side Effects Be Permanent?

No, Nucala side effects are typically temporary and resolve on their own. Serious side effects are rare but should be reported to your doctor immediately.

What Should I Do If Side Effects Persist?

If your side effects last longer than expected or worsen, consult your healthcare provider for guidance.


Final Thoughts

Understanding how long Nucala side effects last is essential for anyone using this medication. While most side effects are mild and short-lived, staying informed and proactive can help you manage them effectively. Always consult your healthcare provider if you have concerns or experience severe symptoms.

What’s your experience with Nucala? Share your thoughts in the comments below!


Dandruff in Beard: Causes, Treatment, and Prevention

What is Beard Dandruff?

Beard dandruff, also known as beardruff, is the flaky, white or yellowish skin that appears in your beard. It’s often itchy, embarrassing, and frustrating to deal with. Just like dandruff on your scalp, beardruff is caused by a combination of dryness, dead skin buildup, and sometimes fungal infections.

Dandruff in Beard Causes Treatment and Prevention1

If you've ever wondered why your beard is “snowing” even when your grooming game is strong, you're not alone. Many men face this issue, but the good news is that it's completely treatable!


What Causes Dandruff in Beard?

Understanding the root cause of beard dandruff can help you address it more effectively. Here are the main culprits:

1. Dry Skin

When the skin beneath your beard lacks moisture, it becomes dry and flaky. Winter weather, low humidity, and hot showers can exacerbate this problem.

2. Fungal Infections

A yeast-like fungus called Malassezia globosa thrives on the natural oils (sebum) produced by your skin. It can lead to irritation and excessive flaking.

3. Improper Beard Care

Skipping regular washing and moisturizing can allow dead skin cells to accumulate, creating flakes. Using harsh products can also irritate the sensitive skin under your beard.

4. Skin Conditions

Certain conditions, like seborrheic dermatitis or eczema, can cause dandruff in your beard. These conditions require specific treatments and often recur if not managed properly.

Dandruff in Beard Causes Treatment and Prevention

How to Treat Beard Dandruff: Step-by-Step Guide

Dealing with beard dandruff doesn’t have to be complicated. Follow these steps to say goodbye to flakes:

1. Wash Your Beard Regularly

Use a gentle beard shampoo or cleanser that’s designed to remove dirt, oil, and flakes without stripping your skin of moisture. Avoid regular shampoos as they can be too harsh.

2. Exfoliate the Skin Beneath

Use a beard brush or a soft exfoliating tool to remove dead skin cells. This helps prevent buildup and allows your products to penetrate better.

3. Moisturize Your Beard and Skin

Apply a beard oil or balm daily to hydrate your skin and beard. Look for products containing ingredients like argan oil, jojoba oil, and shea butter.

4. Use an Anti-Dandruff Product

If your beardruff persists, try a medicated anti-dandruff shampoo containing active ingredients like zinc pyrithione or ketoconazole. Gently massage it into your beard and leave it on for a few minutes before rinsing.

5. Rinse and Dry Thoroughly

Always rinse your beard thoroughly after washing to remove product residue. Pat your beard dry with a soft towel—don’t rub, as this can irritate your skin.

6. Stay Consistent

Regular care is key. Follow this routine daily or as needed to keep your beard healthy and flake-free.

Dandruff in Beard Causes Treatment and Prevention2

Preventing Dandruff in Your Beard

Once you’ve tackled beardruff, here’s how to prevent it from returning:

1. Hydrate Inside and Out

Drink plenty of water to keep your skin hydrated from within. Use a humidifier during dry seasons to maintain moisture levels in the air.

2. Choose the Right Products

Avoid products with alcohol or synthetic fragrances, as they can dry out your skin. Opt for natural, nourishing products instead.

3. Maintain Good Hygiene

Wash and groom your beard regularly. Clean tools like combs and brushes to prevent the buildup of dirt and oils.

4. Protect Your Beard from Harsh Elements

Cold weather and strong winds can dry out your skin. Use a scarf or beard balm to shield your beard when outdoors.


Best Products for Beard Dandruff

Here are some top-rated products to help manage and prevent beard dandruff:

  1. Beard Wash: Jack Black Beard Wash
  2. Beard Oil: Honest Amish Classic Beard Oil
  3. Exfoliating Brush: ZilberHaar Beard Brush
  4. Anti-Dandruff Shampoo: Nizoral A-D Anti-Dandruff Shampoo
  5. Beard Balm: Viking Revolution Beard Balm

Each of these products is designed to hydrate, exfoliate, or treat dandruff effectively. Choose the ones that suit your beard type and skin needs.


When to See a Dermatologist

If your beard dandruff doesn’t improve despite consistent care, or if you experience redness, swelling, or pain, it’s time to consult a dermatologist. You may have an underlying skin condition that requires professional treatment.


Final Thoughts

Dandruff in your beard can be annoying, but it doesn’t have to be permanent. With the right care routine, products, and a bit of patience, you can keep your beard looking healthy and flake-free.

Start implementing these tips today, and you’ll soon notice a significant improvement. Your beard deserves the same level of care as the hair on your head—if not more!

Have any beard care tips or experiences to share? Drop them in the comments below. Let’s keep the conversation going!